Prerequisites
System requirements:
- 2 GHz dual core processor
- 4 GiB RAM (system memory)
- 25 GB of hard-drive space (or USB stick, memory card or external drive but see LiveCD for an alternative approach)
- VGA capable of 1024x768 screen resolution
- Either a CD/DVD drive or a USB port for the installer media
- Internet access is helpful
Other requirements:
- Because of installing Ubuntu dual boot with Windows 10 UEFI/GPT, you have to have Windows 10 UEFI installed on your computer and your hard drive should be GPT format. How to check if your Windows is UEFI and your drive is GPT
- A 4GB or larger USB stick/flash drive (remember to backup your data because we will format the USB stick/flash drive)
Installing Instruction
Download Ubuntu
You need to access Ubuntu home page to download the latest version. In this post, I will use Ubuntu 18.04 LTS

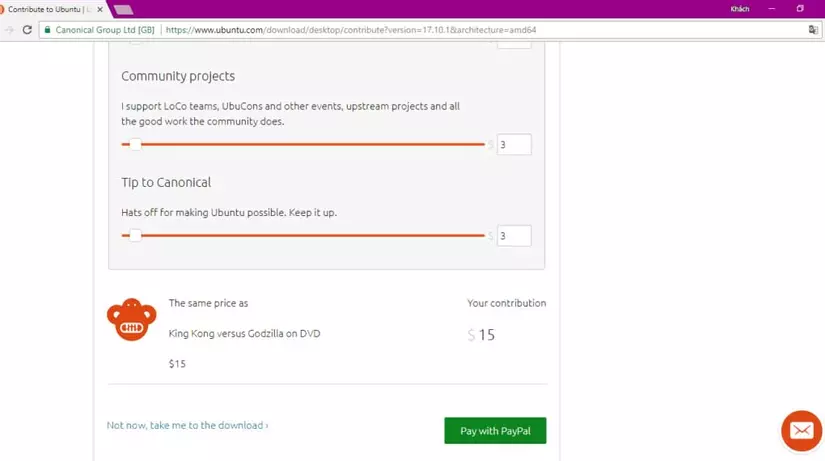
Choose Not now, take me to the download to download Ubuntu
Create the partition to install Ubuntu on
When waiting for downloading, let's partition your disk:
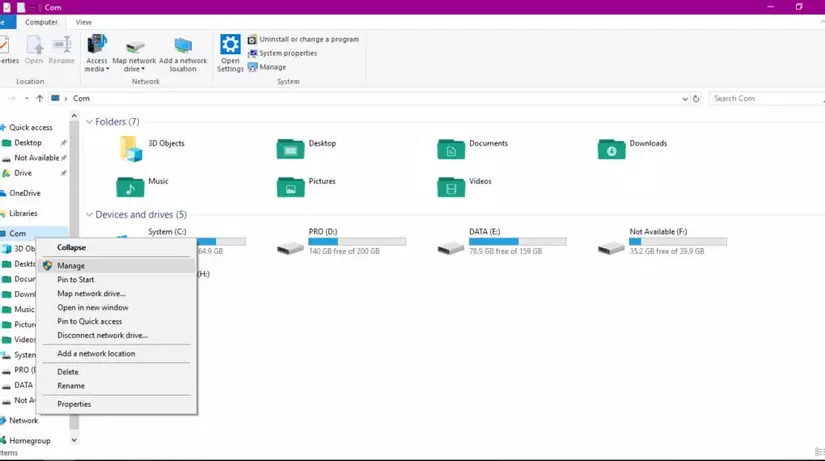
- Right click on This PC => choose Manage
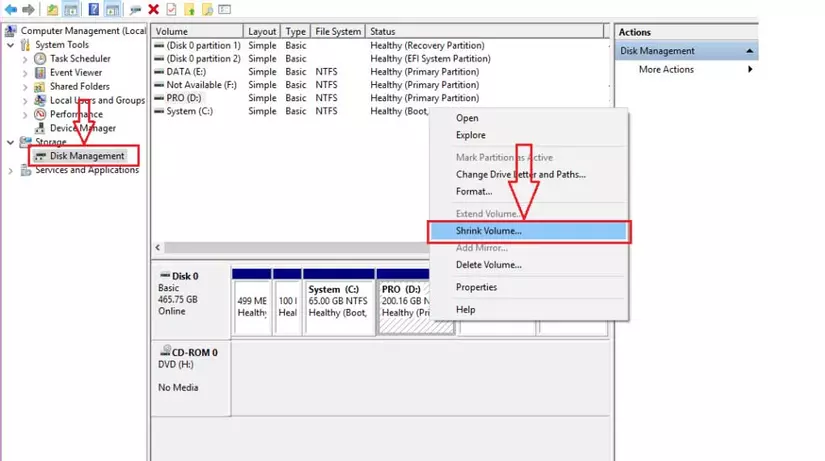
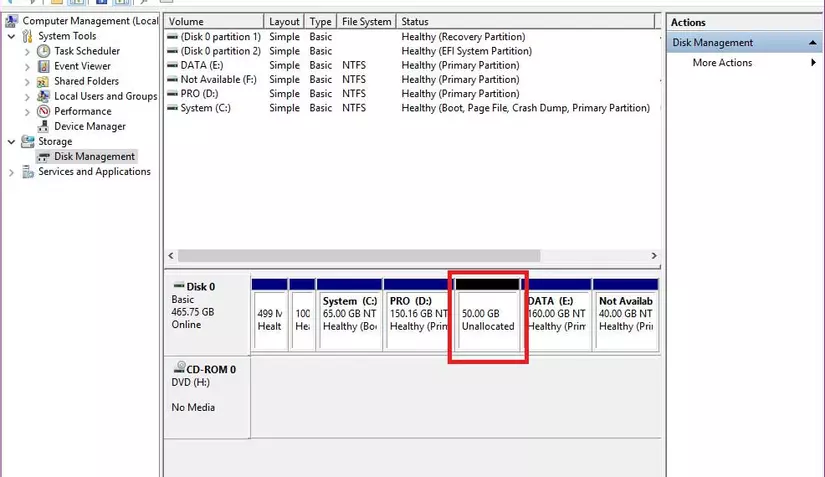
Choose Disk Management => right click on the partition that has the most free space (I choose D: drive) => choose Shrink Volume
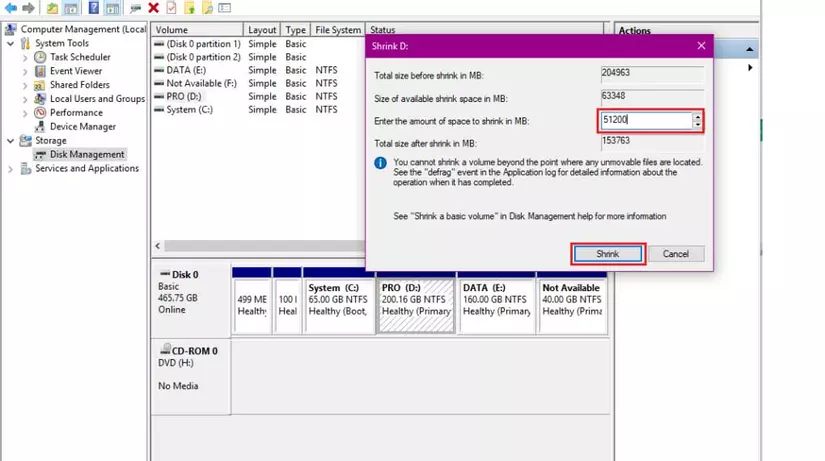
Enter the size of the partition you want to install Ubuntu on, I recommend the size should be 30GB minimum. Here I will get 50GB (50 * 1024MB = 51200MB). You can enter as much as the free space that your drive has. => Choose Shrink and wait for some minutes
Here is the partition to install Ubuntu on:
Create bootable USB flash drive
Next, you need to create a Bootable USB flash drive, I will use Rufus 2.18 create one. Download Rufus and follow the steps in the screenshot:
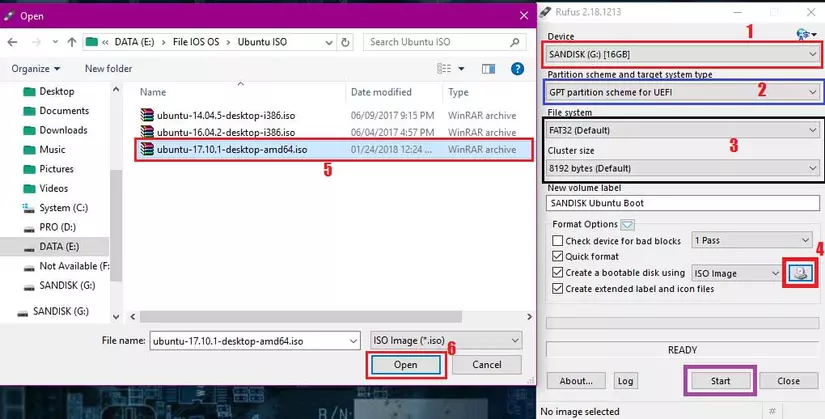
I will explain the steps:
- Choose the USB stick/flash drive to create Bootable
- Choose GPT partition scheme for UEFI because you are installing Ubuntu dual boot with Windows UEFI/GPT
- Leave this part as default
- Choose the .iso file you have downloaded previously
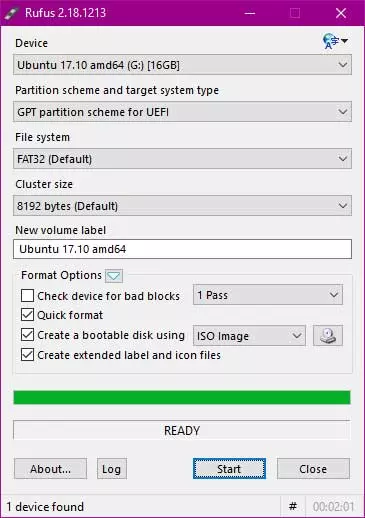
Choose Start to create the bootable USB. Click OK on any pop-up screens. And here is the result:
Turn off fast startup
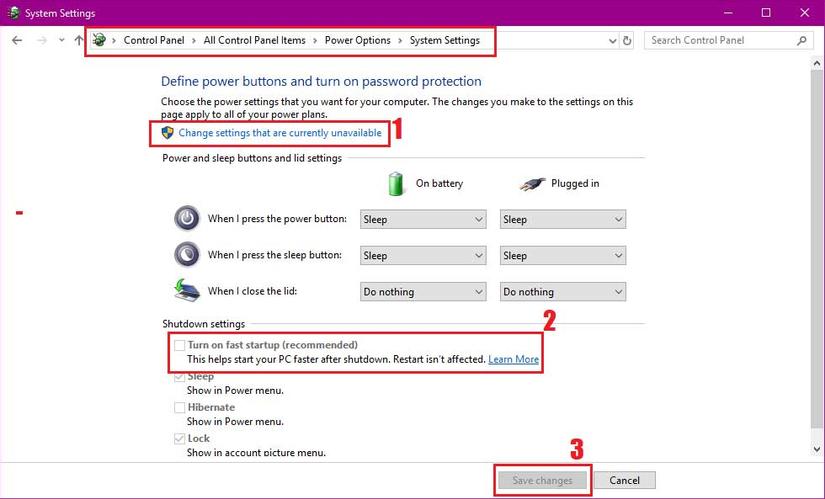
Open Control Panel => Power Options=> Choose what the power buttons do and do as screenshot shown to disable fast startup on Windows 10 (if it is turned on)
Installing Ubuntu
-
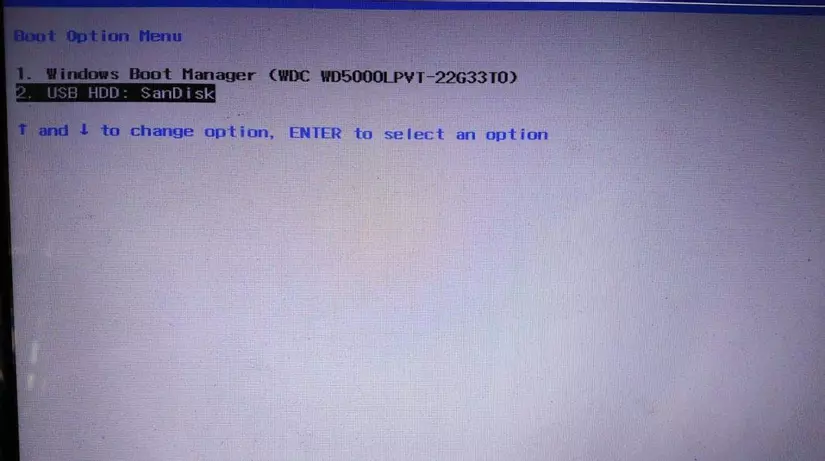
After all the previous steps are done, restart your computer. You should research to find out the hotkey to open Boot Order/ Boot Menu (It is different among computer manufacturers)
-
Choose boot from your USB. If there are 2 USB appeared, choose the one with UEFI (or EFI) prefix. In my case, I get only one
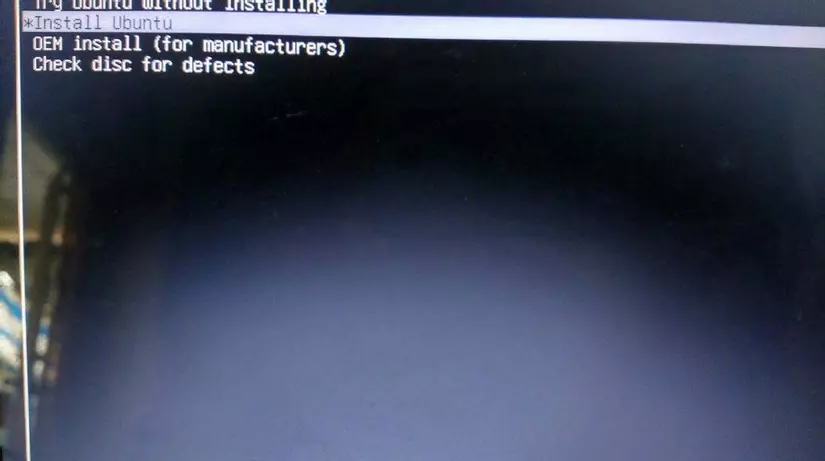
- Choose Install Ubuntu to start the installation
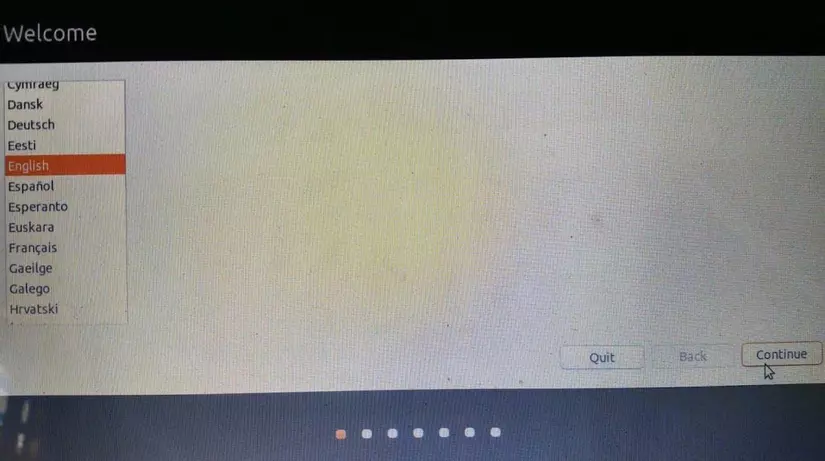
- Choose your language. Here I choose English
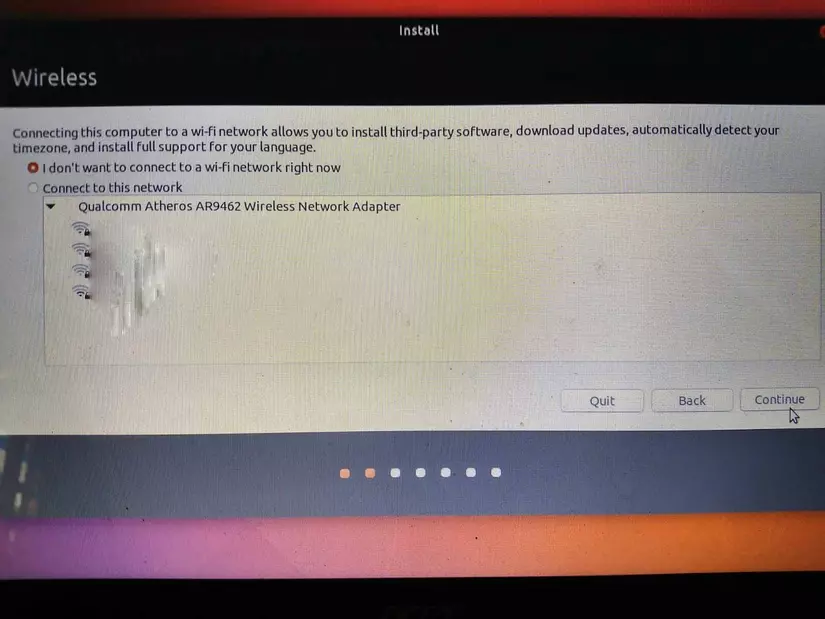
- Connect to the Wifi (you can choose none) and click Continue
- Unselect all to install faster or choose Install third-party software to install additional software
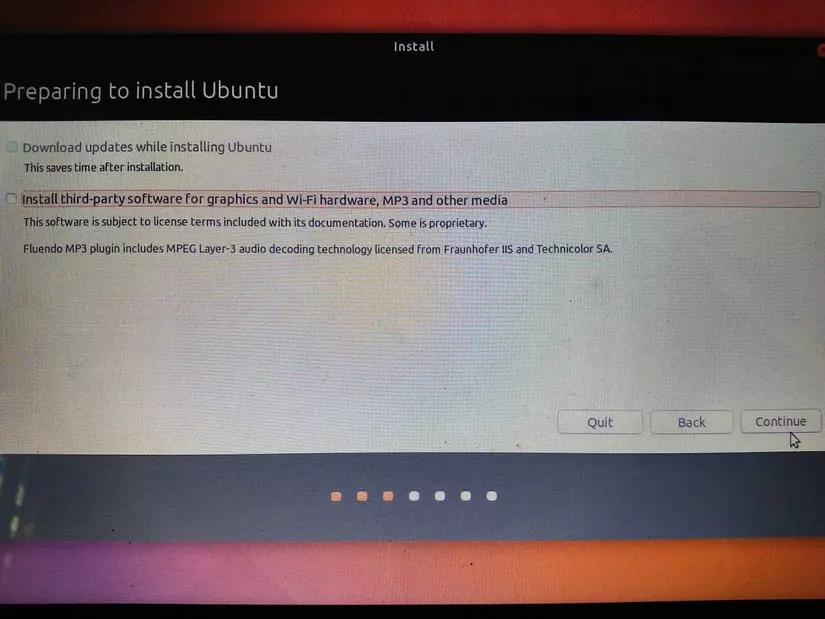
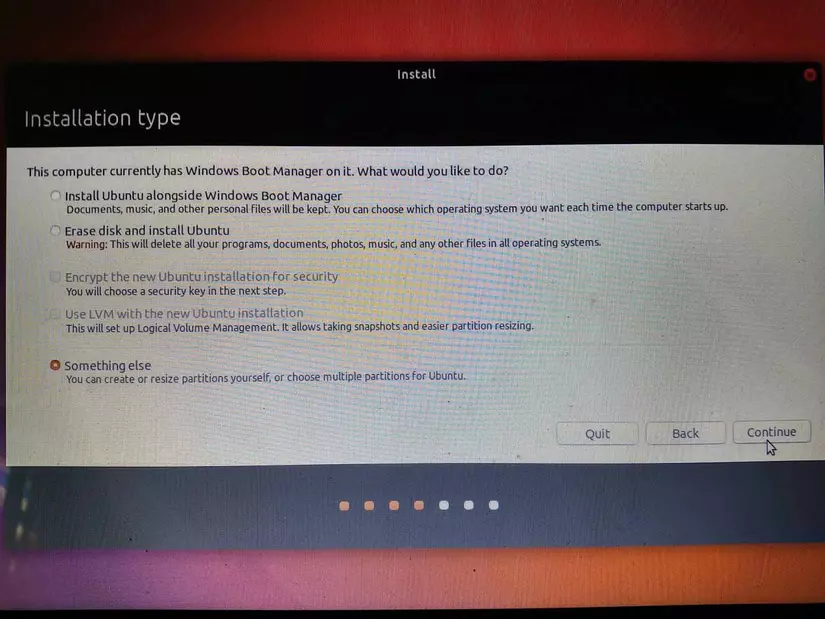
- This is an important step, you have these following choices:
- Install Ubuntu alongside Windows Boot Manager: to install dual boot with Windows 10 but it will affect the partition where Windows is installed on
- Erase disk and install Ubuntu: This option will erase every data on disk (inlcuding Windows) and install Ubuntu
- Something else: I will choose this option to dual boot Ubuntu and Windows on the partition created previously
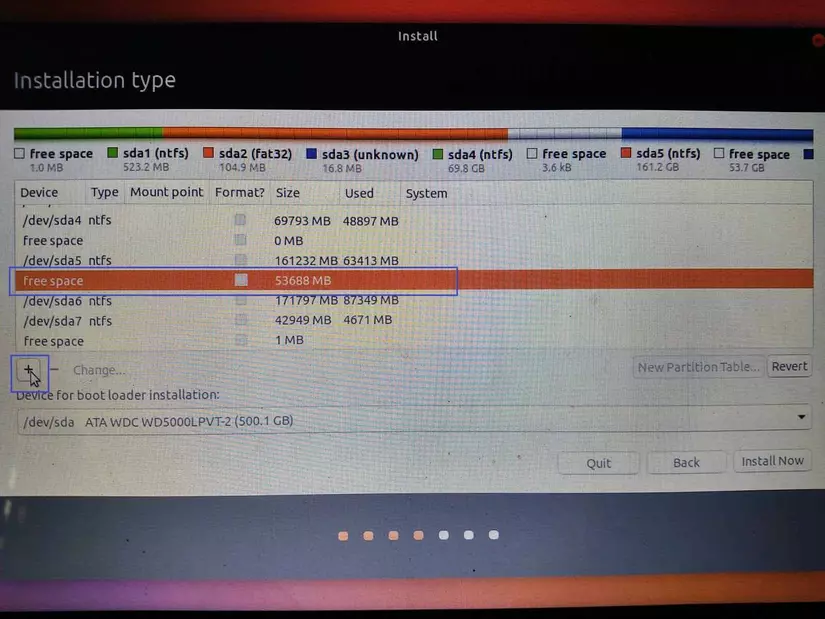
- This is the most important step in this tutorial, so be careful
Don't blink, or you'll miss me
I will create 3 partition for Ubuntu: root, swap and home
Looking for the partition you have created, it will be named Free space, its size is nearly the same as you provided (The size calculation of Windows and Ubuntu are different, don't worry about that)
Choose Free space partition and click + sign
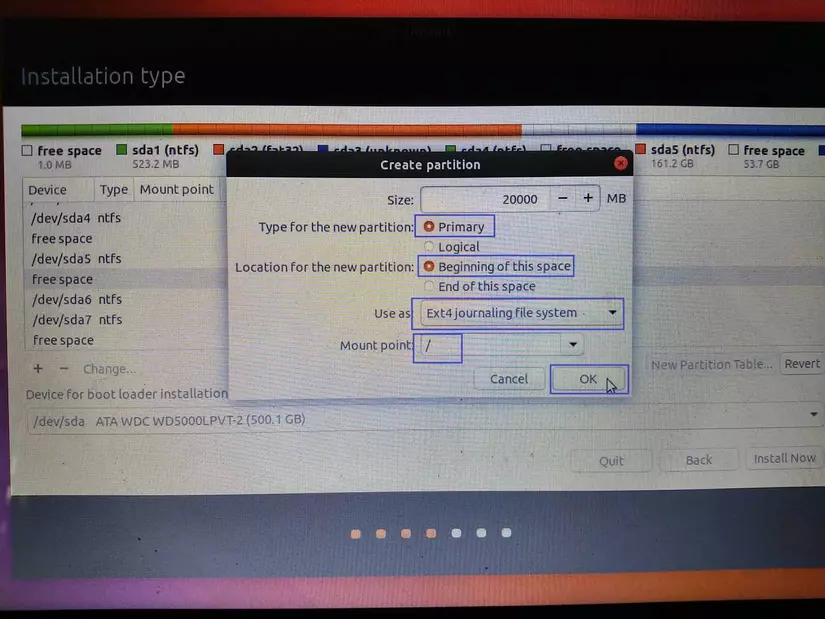
In the opened dialog, enter the size for root partition (should be 15-20GB). Here I get 20GB. Setting as below and choose OK to create.
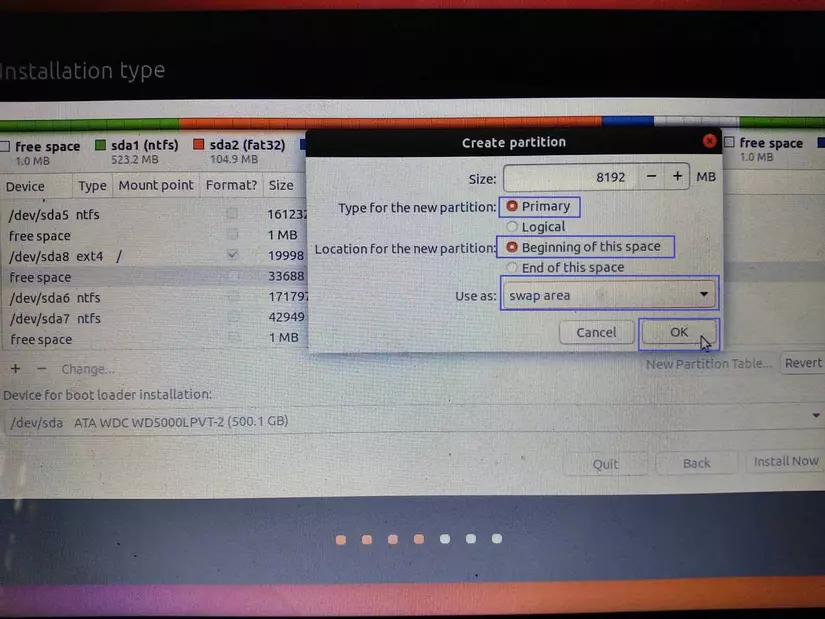
Next is the swap partition, choose Free space and click + sign. This is the space when your RAM is not enough, Ubuntu will use it as virtual RAM. This partition should be x2 RAM in size. I got 4GB RAM so my swap will be 4 * 1024MB = 8192MB. Configure as below and choose OK.
One more thing, home partition is used to store your data. You can config home as same as root except size of this partition is the remaining size you have created:
- Type for the new partition: choose Primary
- Location for the new partition: choose Beginning of this space
- Use as: choose Ext4 jouraling file system.
- Mount point: /home
- => click OK
Last but not least, in Device for boot loader installation, choose Windows Boot Manager
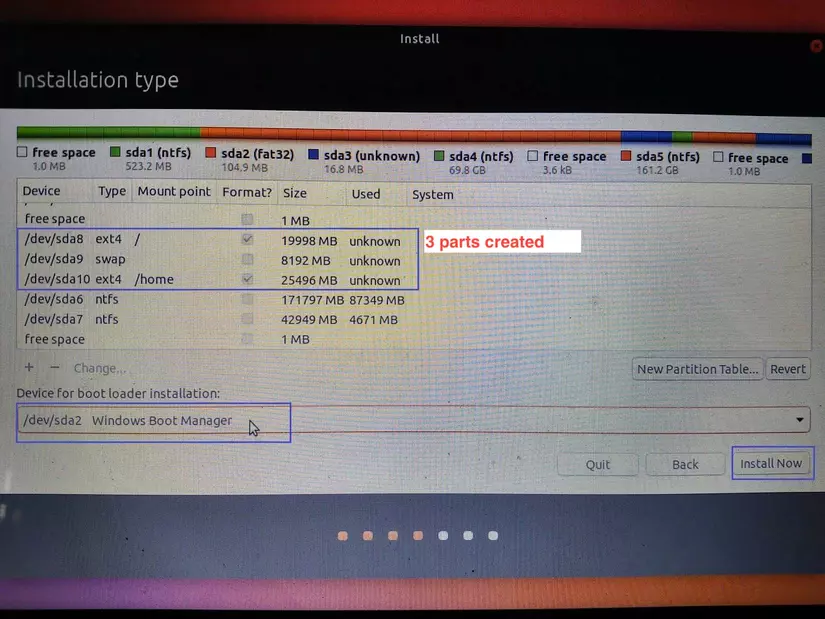
Click Install now. One dialog will pop-up, just click OK.
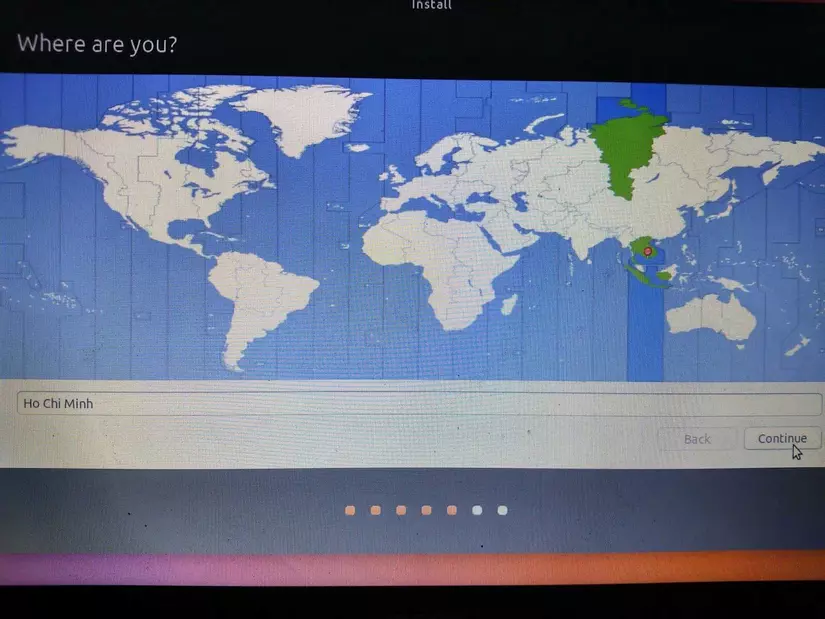
- Choose your timezone and Continue
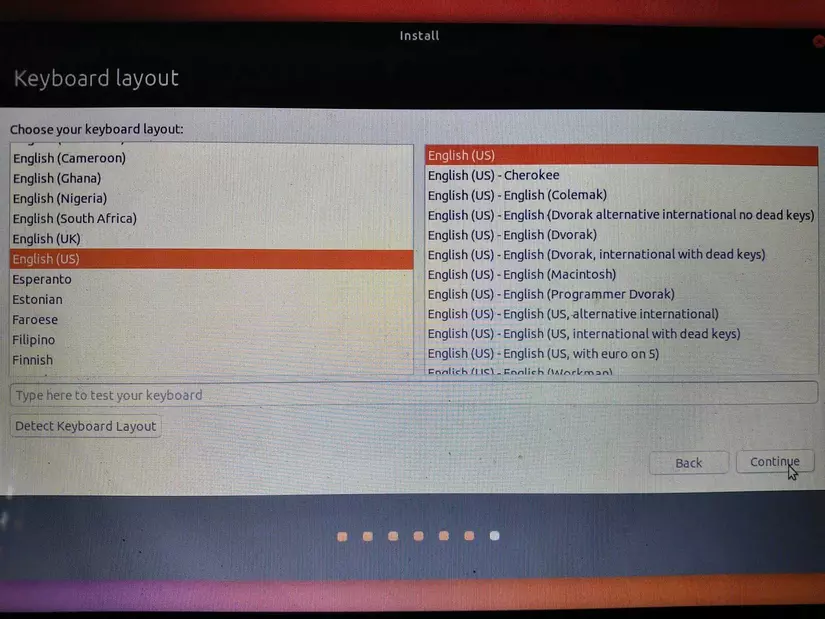
- Choose your keyboard
- Create an account to login into Ubuntu
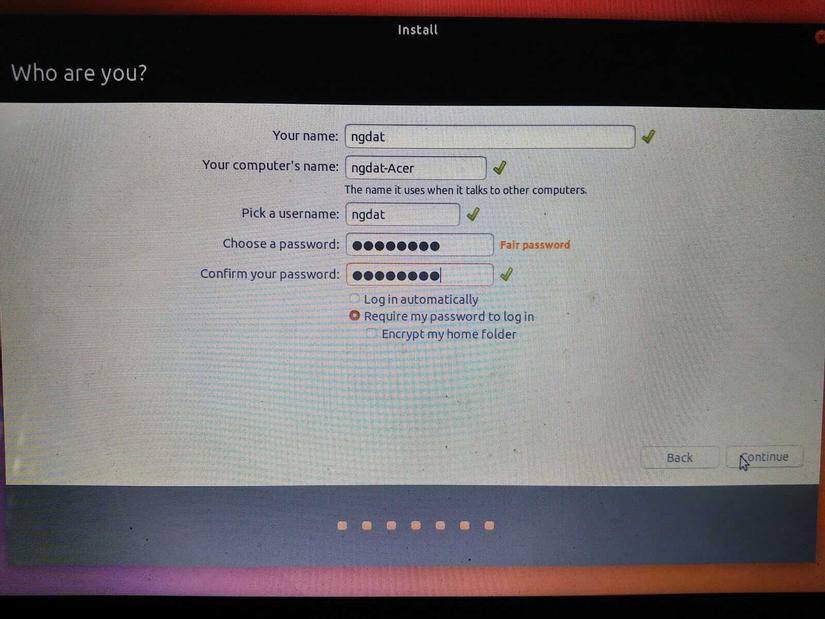
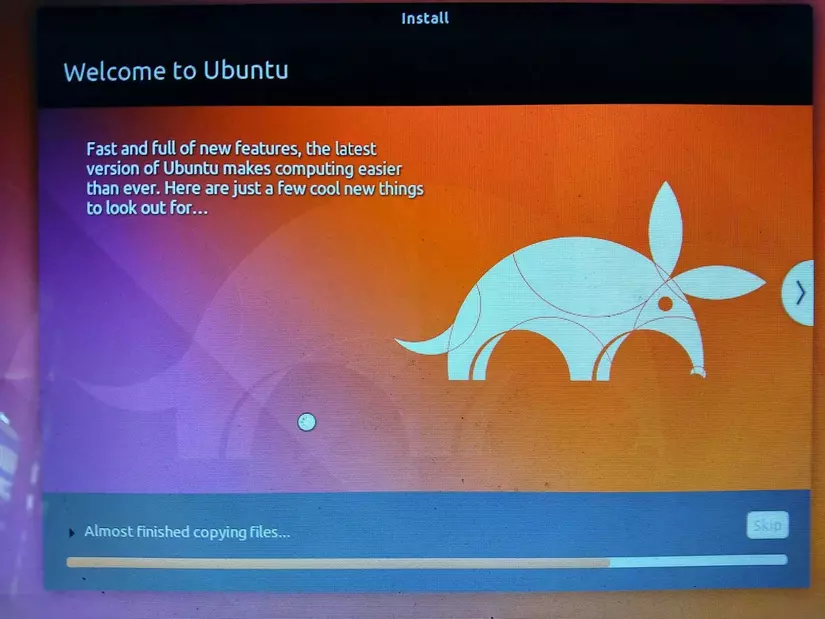
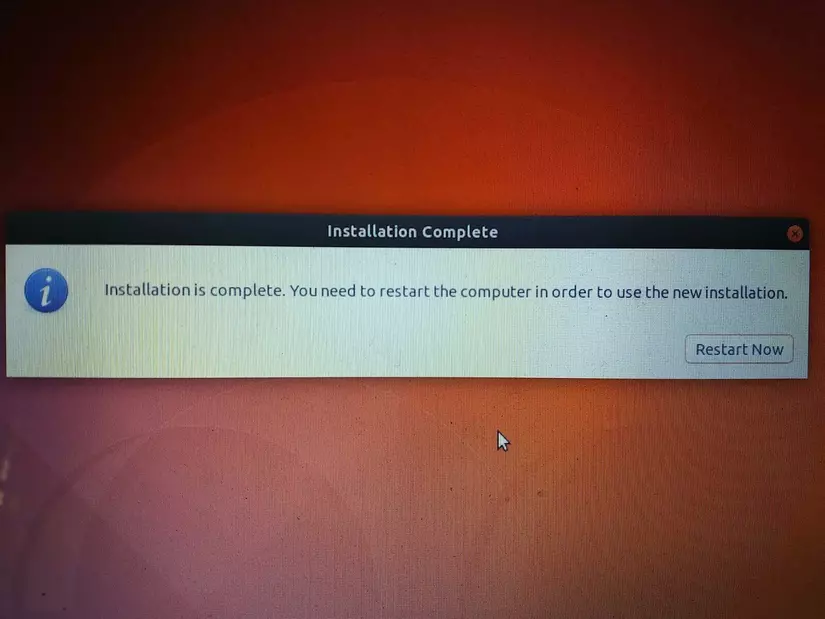
- Now, just wait for the installation finished and restart
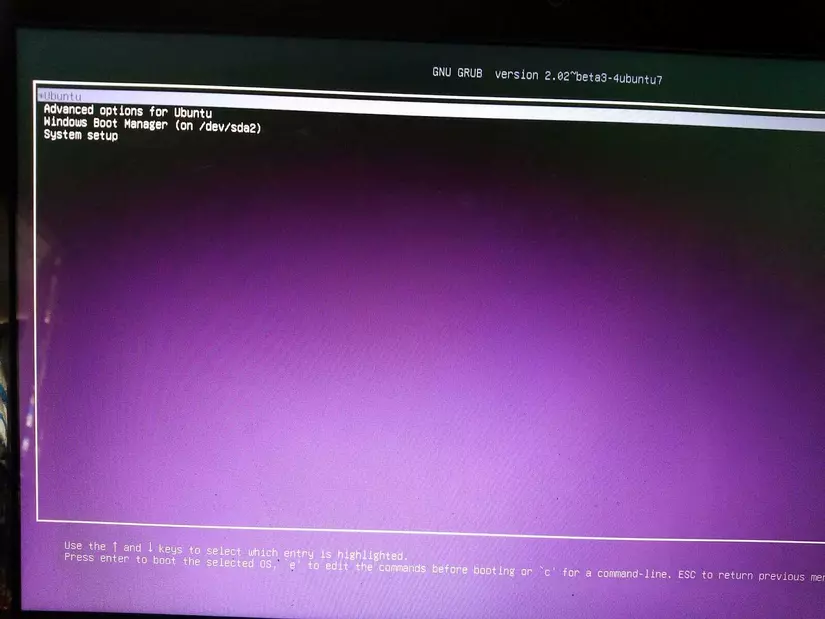
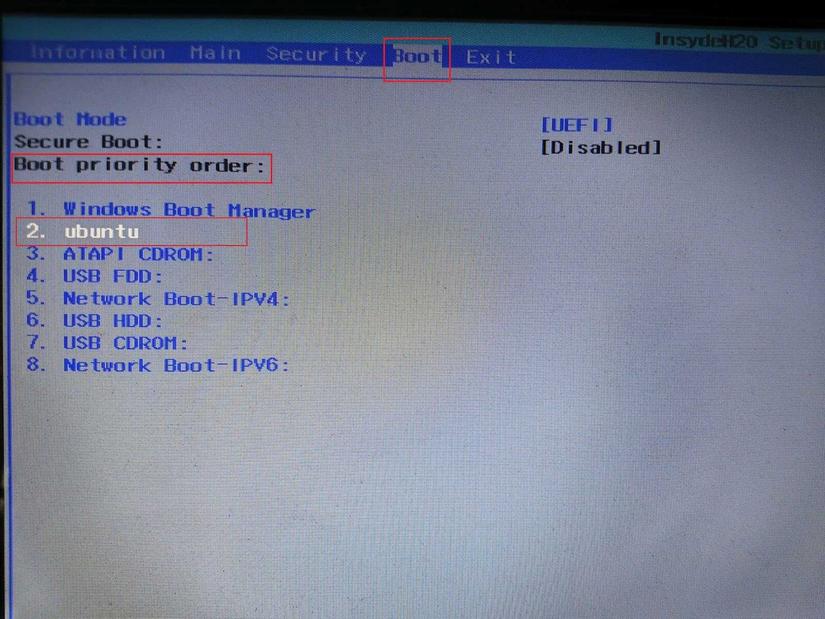
Nếu máy tính khởi động lại không có màn hình Grub chọn Ubuntu mà vào thẳng Windows bạn có thể vào chỉnh BIOS/UEFI. Tại phần thứ tự boot bạn hãy đưa Ubuntu lên đầu tiên.
Giao diện BIOS/UEFI của các hãng có thể khác nhau, nói chung bạn hãy tìm các phần liên quan đến Boot. Ví dụ như giao diện của mình:
If your computer restart and you get Windows welcome screen instead of Grub screen to access Ubuntu, you can configure it in BIOS/UEFI. In Boot order, move Ubuntu to first order.
BIOS/UEFI interface is different among PC manufacturers so you should search for yours. For example, my BIOS interface shows like this:
Conclusion
By this guideline, hope you guys can install Ubuntu by yourself. GLHF
