Giới thiệu chung
Airflow là gì?
Airflow là một hệ thống mã nguồn mở phát triển bởi Airbnb và sau đó được chuyển giao cho cộng đồng Apache. Được giới thiệu lần đầu vào năm 2014, Airflow trở thành một trong những công cụ quản lý công việc lập lịch và quản lý quy trình hàng đầu trong cộng đồng phân tích dữ liệu và khoa học dữ liệu.
Airflow cho phép người dùng định nghĩa (define), lập lịch (schedule) và xử lý các công việc phức tạp trong quy trình dữ liệu. Với Airflow, người dùng có thể xây dựng và quản lý các luồng công việc phức tạp bằng cách sử dụng ngôn ngữ Python. Các công việc được biểu diễn bằng các đối tượng được gọi là "dags" (Directed Acyclic Graphs - Đồ thị có hướng không chu trình), trong đó mỗi nút trong đồ thị đại diện cho một công việc và các cạnh đại diện cho các phụ thuộc giữa các công việc.
Một ví dụ về đoạn code sử dụng airflow:
from datetime import datetime from airflow import DAG
from airflow.decorators import task
from airflow.operators.bash import BashOperator # A DAG represents a workflow, a collection of tasks
with DAG(dag_id="demo", start_date=datetime(2022, 1, 1), schedule="0 0 * * *") as dag: # Tasks are represented as operators hello = BashOperator(task_id="hello", bash_command="echo hello") @task() def airflow(): print("airflow") # Set dependencies between tasks hello >> airflow()
Một trong những điểm mạnh của Airflow là khả năng mở rộng linh hoạt. Airflow hỗ trợ nhiều loại công nghệ xử lý dữ liệu, bao gồm các công nghệ như Hadoop, Spark, SQL, Docker và nhiều công nghệ khác. Điều này cho phép người dùng tận dụng sức mạnh của các công nghệ khác nhau để xử lý các công việc trong quy trình dữ liệu.
Airflow cung cấp giao diện web để quản lý, giám sát và xem trạng thái của các công việc và quy trình dữ liệu. Người dùng có thể theo dõi tiến trình của các công việc, xem lịch sử thực thi và kiểm tra lỗi, giúp tăng cường tính minh bạch và kiểm soát quy trình.
Với cộng đồng người dùng đông đảo và sự hỗ trợ từ Apache, Airflow đã trở thành một công cụ quan trọng trong việc quản lý và tổ chức các quy trình dữ liệu phức tạp. Sự linh hoạt, khả năng mở rộng và khả năng tùy chỉnh cao của Airflow đã thu hút sự quan tâm và sử dụng rộng rãi trong cộng đồng phân tích dữ liệu và khoa học dữ liệu.
Ứng dụng của Airflow trong Machine learning pipeline
Airflow cũng được sử dụng để xây dựng các pipeline machine learning phức tạp. Dưới đây là một số ứng dụng của Airflow trong việc xây dựng machine learning pipeline:
-
Xử lý dữ liệu: Airflow cho phép định nghĩa các bước xử lý dữ liệu trước khi huấn luyện mô hình. Bạn có thể chuẩn hóa dữ liệu, xử lý missing data, thực hiện biến đổi dữ liệu để sử dụng cho việc huấn luyện mô hình.
-
Huấn luyện mô hình: Airflow cho phép lập lịch và quản lý quy trình huấn luyện mô hình. Bạn có thể định nghĩa các công việc để huấn luyện mô hình trên các tập dữ liệu đã được xử lý. Bạn có thể lập lịch để Airflow tự động chạy pipeline training định kỳ hoặc khi có data mới.
-
Đánh giá và so sánh mô hình: Airflow cho phép tổ chức các công việc để đánh giá và so sánh mô hình. Bạn có thể định nghĩa các công việc để tính toán các độ đo đánh giá như accuracy, f1, AUC,...
-
Triển khai mô hình: Sau khi huấn luyện và đánh giá mô hình, Airflow cung cấp khả năng triển khai mô hình tự động. Bạn có thể định nghĩa các công việc để triển khai mô hình vào môi trường production.
-
Giám sát và quản lý mô hình: Airflow cung cấp giao diện web để theo dõi, quản lý các công việc và mô hình. Bạn có thể theo dõi trạng thái của các công việc, xem kết quả đánh giá mô hình và giám sát hiệu suất của mô hình sau khi triển khai.
Với sự linh hoạt và khả năng mở rộng của Airflow, bạn có thể xây dựng các pipeline machine learning phức tạp, tự động hóa quy trình, tăng cường tính nhất quán và hiệu quả trong việc xây dựng và triển khai mô hình machine learning.
Cài đặt
Trong doc của Airflow có nhiều cách để cài đặt. Để tiện cho việc setup sử dụng cá nhân nhanh chóng và ít lỗi phát sinh thì mình khuyến nghị nên cài bằng Docker Image. Nếu như sử dụng trong tổ chức thì bạn nên cài bằng cách sử dụng Helm Chart. Trong bài viết, mình sẽ tập trung vào cách cài đặt bằng Docker Image.
Trước hết, để cài Airflow bằng Docker Image thì tất nhiên máy bạn phải cài Docker trước  và cài thêm Docker Compose với phiên bản từ v1.29.1 trở lên.
Bước tiếp theo, ta sẽ tải file docker-compose.yaml của Airflow về. Sử dụng lệnh sau:
curl -LfO 'https://airflow.apache.org/docs/apache-airflow/2.6.1/docker-compose.yaml'
File docker-compose.yaml sẽ như sau:
# Licensed to the Apache Software Foundation (ASF) under one
# or more contributor license agreements. See the NOTICE file
# distributed with this work for additional information
# regarding copyright ownership. The ASF licenses this file
# to you under the Apache License, Version 2.0 (the
# "License"); you may not use this file except in compliance
# with the License. You may obtain a copy of the License at
#
# http://www.apache.org/licenses/LICENSE-2.0
#
# Unless required by applicable law or agreed to in writing,
# software distributed under the License is distributed on an
# "AS IS" BASIS, WITHOUT WARRANTIES OR CONDITIONS OF ANY
# KIND, either express or implied. See the License for the
# specific language governing permissions and limitations
# under the License.
# # Basic Airflow cluster configuration for CeleryExecutor with Redis and PostgreSQL.
#
# WARNING: This configuration is for local development. Do not use it in a production deployment.
#
# This configuration supports basic configuration using environment variables or an .env file
# The following variables are supported:
#
# AIRFLOW_IMAGE_NAME - Docker image name used to run Airflow.
# Default: apache/airflow:2.6.1
# AIRFLOW_UID - User ID in Airflow containers
# Default: 50000
# AIRFLOW_PROJ_DIR - Base path to which all the files will be volumed.
# Default: .
# Those configurations are useful mostly in case of standalone testing/running Airflow in test/try-out mode
#
# _AIRFLOW_WWW_USER_USERNAME - Username for the administrator account (if requested).
# Default: airflow
# _AIRFLOW_WWW_USER_PASSWORD - Password for the administrator account (if requested).
# Default: airflow
# _PIP_ADDITIONAL_REQUIREMENTS - Additional PIP requirements to add when starting all containers.
# Use this option ONLY for quick checks. Installing requirements at container
# startup is done EVERY TIME the service is started.
# A better way is to build a custom image or extend the official image
# as described in https://airflow.apache.org/docs/docker-stack/build.html.
# Default: ''
#
# Feel free to modify this file to suit your needs.
---
version: '3.8'
x-airflow-common: &airflow-common # In order to add custom dependencies or upgrade provider packages you can use your extended image. # Comment the image line, place your Dockerfile in the directory where you placed the docker-compose.yaml # and uncomment the "build" line below, Then run `docker-compose build` to build the images. image: ${AIRFLOW_IMAGE_NAME:-apache/airflow:2.6.1} # build: . environment: &airflow-common-env AIRFLOW__CORE__EXECUTOR: CeleryExecutor AIRFLOW__DATABASE__SQL_ALCHEMY_CONN: postgresql+psycopg2://airflow:airflow@postgres/airflow # For backward compatibility, with Airflow <2.3 AIRFLOW__CORE__SQL_ALCHEMY_CONN: postgresql+psycopg2://airflow:airflow@postgres/airflow AIRFLOW__CELERY__RESULT_BACKEND: db+postgresql://airflow:airflow@postgres/airflow AIRFLOW__CELERY__BROKER_URL: redis://:@redis:6379/0 AIRFLOW__CORE__FERNET_KEY: '' AIRFLOW__CORE__DAGS_ARE_PAUSED_AT_CREATION: 'true' AIRFLOW__CORE__LOAD_EXAMPLES: 'true' AIRFLOW__API__AUTH_BACKENDS: 'airflow.api.auth.backend.basic_auth,airflow.api.auth.backend.session' # yamllint disable rule:line-length # Use simple http server on scheduler for health checks # See https://airflow.apache.org/docs/apache-airflow/stable/administration-and-deployment/logging-monitoring/check-health.html#scheduler-health-check-server # yamllint enable rule:line-length AIRFLOW__SCHEDULER__ENABLE_HEALTH_CHECK: 'true' # WARNING: Use _PIP_ADDITIONAL_REQUIREMENTS option ONLY for a quick checks # for other purpose (development, test and especially production usage) build/extend Airflow image. _PIP_ADDITIONAL_REQUIREMENTS: ${_PIP_ADDITIONAL_REQUIREMENTS:-} volumes: - ${AIRFLOW_PROJ_DIR:-.}/dags:/opt/airflow/dags - ${AIRFLOW_PROJ_DIR:-.}/logs:/opt/airflow/logs - ${AIRFLOW_PROJ_DIR:-.}/config:/opt/airflow/config - ${AIRFLOW_PROJ_DIR:-.}/plugins:/opt/airflow/plugins - /data:/data user: "${AIRFLOW_UID:-50000}:0" depends_on: &airflow-common-depends-on redis: condition: service_healthy postgres: condition: service_healthy deploy: resources: reservations: devices: - driver: nvidia device_ids: ["0", "1"] capabilities: [gpu] shm_size: 5gb services: postgres: image: postgres:13 environment: POSTGRES_USER: airflow POSTGRES_PASSWORD: airflow POSTGRES_DB: airflow volumes: - postgres-db-volume:/var/lib/postgresql/data healthcheck: test: ["CMD", "pg_isready", "-U", "airflow"] interval: 10s retries: 5 start_period: 5s restart: always redis: image: redis:latest expose: - 6379 healthcheck: test: ["CMD", "redis-cli", "ping"] interval: 10s timeout: 30s retries: 50 start_period: 30s restart: always airflow-webserver: <<: *airflow-common command: webserver ports: - "8080:8080" healthcheck: test: ["CMD", "curl", "--fail", "http://localhost:8080/health"] interval: 30s timeout: 10s retries: 5 start_period: 30s restart: always depends_on: <<: *airflow-common-depends-on airflow-init: condition: service_completed_successfully airflow-scheduler: <<: *airflow-common command: scheduler healthcheck: test: ["CMD", "curl", "--fail", "http://localhost:8974/health"] interval: 30s timeout: 10s retries: 5 start_period: 30s restart: always depends_on: <<: *airflow-common-depends-on airflow-init: condition: service_completed_successfully airflow-worker: <<: *airflow-common command: celery worker healthcheck: test: - "CMD-SHELL" - 'celery --app airflow.executors.celery_executor.app inspect ping -d "celery@$${HOSTNAME}"' interval: 30s timeout: 10s retries: 5 start_period: 30s environment: <<: *airflow-common-env # Required to handle warm shutdown of the celery workers properly # See https://airflow.apache.org/docs/docker-stack/entrypoint.html#signal-propagation DUMB_INIT_SETSID: "0" restart: always depends_on: <<: *airflow-common-depends-on airflow-init: condition: service_completed_successfully airflow-triggerer: <<: *airflow-common command: triggerer healthcheck: test: ["CMD-SHELL", 'airflow jobs check --job-type TriggererJob --hostname "$${HOSTNAME}"'] interval: 30s timeout: 10s retries: 5 start_period: 30s restart: always depends_on: <<: *airflow-common-depends-on airflow-init: condition: service_completed_successfully airflow-init: <<: *airflow-common entrypoint: /bin/bash # yamllint disable rule:line-length command: - -c - | function ver() { printf "%04d%04d%04d%04d" $${1//./ } } airflow_version=$$(AIRFLOW__LOGGING__LOGGING_LEVEL=INFO && gosu airflow airflow version) airflow_version_comparable=$$(ver $${airflow_version}) min_airflow_version=2.2.0 min_airflow_version_comparable=$$(ver $${min_airflow_version}) if (( airflow_version_comparable < min_airflow_version_comparable )); then echo echo -e "\033[1;31mERROR!!!: Too old Airflow version $${airflow_version}!\e[0m" echo "The minimum Airflow version supported: $${min_airflow_version}. Only use this or higher!" echo exit 1 fi if [[ -z "${AIRFLOW_UID}" ]]; then echo echo -e "\033[1;33mWARNING!!!: AIRFLOW_UID not set!\e[0m" echo "If you are on Linux, you SHOULD follow the instructions below to set " echo "AIRFLOW_UID environment variable, otherwise files will be owned by root." echo "For other operating systems you can get rid of the warning with manually created .env file:" echo " See: https://airflow.apache.org/docs/apache-airflow/stable/howto/docker-compose/index.html#setting-the-right-airflow-user" echo fi one_meg=1048576 mem_available=$$(($$(getconf _PHYS_PAGES) * $$(getconf PAGE_SIZE) / one_meg)) cpus_available=$$(grep -cE 'cpu[0-9]+' /proc/stat) disk_available=$$(df / | tail -1 | awk '{print $$4}') warning_resources="false" if (( mem_available < 4000 )) ; then echo echo -e "\033[1;33mWARNING!!!: Not enough memory available for Docker.\e[0m" echo "At least 4GB of memory required. You have $$(numfmt --to iec $$((mem_available * one_meg)))" echo warning_resources="true" fi if (( cpus_available < 2 )); then echo echo -e "\033[1;33mWARNING!!!: Not enough CPUS available for Docker.\e[0m" echo "At least 2 CPUs recommended. You have $${cpus_available}" echo warning_resources="true" fi if (( disk_available < one_meg * 10 )); then echo echo -e "\033[1;33mWARNING!!!: Not enough Disk space available for Docker.\e[0m" echo "At least 10 GBs recommended. You have $$(numfmt --to iec $$((disk_available * 1024 )))" echo warning_resources="true" fi if [[ $${warning_resources} == "true" ]]; then echo echo -e "\033[1;33mWARNING!!!: You have not enough resources to run Airflow (see above)!\e[0m" echo "Please follow the instructions to increase amount of resources available:" echo " https://airflow.apache.org/docs/apache-airflow/stable/howto/docker-compose/index.html#before-you-begin" echo fi mkdir -p /sources/logs /sources/dags /sources/plugins chown -R "${AIRFLOW_UID}:0" /sources/{logs,dags,plugins} exec /entrypoint airflow version # yamllint enable rule:line-length environment: <<: *airflow-common-env _AIRFLOW_DB_UPGRADE: 'true' _AIRFLOW_WWW_USER_CREATE: 'true' _AIRFLOW_WWW_USER_USERNAME: ${_AIRFLOW_WWW_USER_USERNAME:-airflow} _AIRFLOW_WWW_USER_PASSWORD: ${_AIRFLOW_WWW_USER_PASSWORD:-airflow} _PIP_ADDITIONAL_REQUIREMENTS: '' user: "0:0" volumes: - ${AIRFLOW_PROJ_DIR:-.}:/sources airflow-cli: <<: *airflow-common profiles: - debug environment: <<: *airflow-common-env CONNECTION_CHECK_MAX_COUNT: "0" # Workaround for entrypoint issue. See: https://github.com/apache/airflow/issues/16252 command: - bash - -c - airflow # You can enable flower by adding "--profile flower" option e.g. docker-compose --profile flower up # or by explicitly targeted on the command line e.g. docker-compose up flower. # See: https://docs.docker.com/compose/profiles/ flower: <<: *airflow-common command: celery flower profiles: - flower ports: - "5555:5555" healthcheck: test: ["CMD", "curl", "--fail", "http://localhost:5555/"] interval: 30s timeout: 10s retries: 5 start_period: 30s restart: always depends_on: <<: *airflow-common-depends-on airflow-init: condition: service_completed_successfully volumes: postgres-db-volume:
Trong file ta thấy một số service được định nghĩa:
- airflow-scheduler - Scheduler quản lý các task và DAG, sau đó trigger các task instance khi các phụ thuộc của chúng được hoàn tất.
- airflow-webserver - Webserver của airflow có địa chỉ http://localhost:8080.
- airflow-worker - Worker thực thi các task được giao bởi scheduler.
- airflow-triggerer - Triggerer chạy một event loop cho các task có thể trì hoãn (deferrable task). Một nhiệm vụ được xem là "deferrable" khi nó có thể bị trì hoãn và chạy vào một thời điểm sau đó, thay vì chạy ngay lập tức. Ví dụ, bạn có thể đặt một nhiệm vụ để chạy hàng ngày vào lúc 2 giờ sáng. Trong trường hợp này, nhiệm vụ sẽ được trì hoãn cho đến khi đến thời điểm 2 giờ sáng tiếp theo, sau đó mới được kích hoạt và chạy. Trong Airflow, triggerer đảm nhận nhiệm vụ chạy một event loop để kiểm tra xem các nhiệm vụ nào đã được đặt lịch và có thể chạy vào thời điểm hiện tại. Khi triggerer phát hiện một nhiệm vụ có thể chạy, nó sẽ kích hoạt nhiệm vụ đó và chuyển nó cho executor để thực thi.
- airflow-init - Trình khởi tạo service.
- postgres - Database.
- redis - Là broker chuyển các message (thông điệp) từ scheduler tới worker. Một broker là một thành phần quan trọng trong kiến trúc hệ thống phân tán của Airflow. Nó đảm nhận nhiệm vụ communication giữa các thành phần khác nhau của hệ thống, như scheduler và worker, để điều phối và quản lý việc thực thi nhiệm vụ. Trong trường hợp của Airflow, Redis được sử dụng như một broker. Khi scheduler định lịch các nhiệm vụ, nó sẽ gửi các thông điệp tới Redis. Các worker sẽ lắng nghe Redis để nhận các thông điệp đó và thực hiện các nhiệm vụ tương ứng. Redis đóng vai trò là một kênh giao tiếp trung gian giữa scheduler và worker, đảm bảo rằng các nhiệm vụ được chuyển giao và thực thi một cách đồng bộ và hiệu quả. Redis được lựa chọn làm broker trong Airflow vì tính nhất quán, tốc độ xử lý nhanh và khả năng xử lý đồng thời. Nó cũng hỗ trợ các tính năng như đặt "thời gian sống" cho các thông điệp, đảm bảo rằng các thông điệp không bị mất đi và có thể được xử lý kịp thời.
Trong file docker-compose.yaml ta sử dụng apache/airflow:2.6.1, bạn có thể thay đổi version khác hoặc custom base image tùy ý, chỉ cần thay đổi thông tin tại phần image của x-airflow-common.
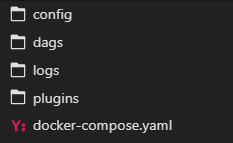
Chú ý rằng file docker-compose.yaml được chứa trong folder project của bạn. Tiếp theo, ta sẽ tạo thêm các folder cần thiết cho Airflow.
Bạn cũng có thể mount thêm các thư mục cần thiết trong phần volumes của x-airflow-common.
Một chú ý nữa, nếu như muốn sử dụng GPU trong quá trình chạy pipeline thì ta thêm phần sau vào x-airflow-common:
deploy: resources: reservations: devices: - driver: nvidia device_ids: ["0", "1"] capabilities: [gpu]
Trong đó, device_ids tùy thuộc vào GPU của bạn
Tiếp theo ta chạy lệnh:
echo -e "AIRFLOW_UID=$(id -u)\nAIRFLOW_GID=0" > .env
Sau khi tạo các folder cần thiết và sửa file docker-compose.yaml. Ta chạy lệnh docker compose up để chạy tất cả các service. Chờ một lúc, ta kiểm tra lại các container đang chạy, nếu như dưới đây là okay
$ docker ps
CONTAINER ID IMAGE COMMAND CREATED STATUS PORTS NAMES
247ebe6cf87a apache/airflow:2.6.1 "/usr/bin/dumb-init …" 3 minutes ago Up 3 minutes (healthy) 8080/tcp compose_airflow-worker_1
ed9b09fc84b1 apache/airflow:2.6.1 "/usr/bin/dumb-init …" 3 minutes ago Up 3 minutes (healthy) 8080/tcp compose_airflow-scheduler_1
7cb1fb603a98 apache/airflow:2.6.1 "/usr/bin/dumb-init …" 3 minutes ago Up 3 minutes (healthy) 0.0.0.0:8080->8080/tcp compose_airflow-webserver_1
74f3bbe506eb postgres:13 "docker-entrypoint.s…" 18 minutes ago Up 17 minutes (healthy) 5432/tcp compose_postgres_1
0bd6576d23cb redis:latest "docker-entrypoint.s…" 10 hours ago Up 17 minutes (healthy) 0.0.0.0:6379->6379/tcp compose_redis_1
Vậy là ta cơ bản đã cài đặt xong Airflow, giờ thì vào địa chỉ webserver và khám phá thôi Địa chỉ là <ip máy bạn>:8080.
Tổng kết
Vậy trong phần này, ta đã đi qua cách cài đặt Airflow sử dụng Docker. Trong phần sau, ta sẽ làm quen một số concept chính trong Airflow.
Tham khảo
[1] https://airflow.apache.org/docs/apache-airflow/stable/installation/index.html