Giới thiệu
Ở bài viết này, mình sẽ giới thiệu cách dùng JWT để bảo vệ cho API của bạn.
Vậy đầu tiên JWT là gì ?
- Về cơ bản JWT là một phương tiện đại diện cho các yêu cầu chuyển giao giữa hai bên Client – Server , các thông tin trong chuỗi JWT được định dạng bằng JSON .
- Cấu trúc của một JWT gồm 3 phần là header , phần payload và phần signature được ngăn cách bởi dấu
..
Cài đặt ứng dụng.
Đầu tiên ta tiến hành install laravel thông qua composer.
composer create-project --prefer-dist laravel/laravel:^7.0 authen-api
Tiếp đến ta chọn package tymon/jwt-auth để tạo JWT cho hệ thống nhé.
composer require tymon/jwt-auth:dev-develop --prefer-source
Sau khi cài xong package, ta publish bằng câu lệnh sau.
php artisan vendor:publish --provider="Tymon\JWTAuth\Providers\LaravelServiceProvider"
Tạo key cho jwt như sau:
php artisan jwt:secret
Vào file app/User.php ta thêm vào như sau
use Tymon\JWTAuth\Contracts\JWTSubject; ...class User extends Authenticatable implements JWTSubject{ public function getJWTIdentifier() { return $this->getKey(); } public function getJWTCustomClaims() { return []; }
Ta config Guard cho ứng dụng trong file config/auth.php
<?php return [ 'defaults' => [ 'guard' => 'api', 'passwords' => 'users', ], 'guards' => [ 'web' => [ 'driver' => 'session', 'provider' => 'users', ], 'api' => [ 'driver' => 'jwt', 'provider' => 'users', 'hash' => false, ], ],
Ta tạo 1 controller như sau:
php artisan make:controller Api/AuthController
Trong file controller vừa tạo
<?php namespace App\Http\Controllers\Api; use Config;
use App\User;
use Carbon\Carbon;
use Illuminate\Http\Request;
use Illuminate\Support\Facades\DB;
use Tymon\JWTAuth\Facades\JWTAuth; use App\Http\Controllers\Controller;
use Illuminate\Support\Facades\Auth;
use Illuminate\Support\Facades\Hash;
use Illuminate\Support\Facades\Validator; class AuthController extends Controller
{ public function __construct() { Auth::shouldUse('api'); } public function signup(Request $request) { $validator = Validator::make($request->all(), [ 'name' => ['required', 'string', 'max:255'], 'email' => ['required', 'string', 'email', 'max:255', 'unique:users'], 'password' => ['required', 'string', 'min:8', 'confirmed'], ]); if($validator->fails()) { return response()->json(['error'=>$validator->errors()->all()],405); } $user = User::create([ 'name' => $request->name, 'email' => $request->email, 'password' => Hash::make($request->password), ]); return response()->json([ 'message' => 'Successfully created user!', 'user' => $user ], 200); } public function login(Request $request) { $validator = Validator::make($request->all(), [ 'email' => 'required|string', 'password' => 'required|string', ]); if($validator->fails()) { return response()->json(['error'=>$validator->errors()->all()],400); } Config::set('jwt.user', 'App\User'); Config::set('auth.providers.users.model', \App\User::class); $token = null; if ($token = JWTAuth::attempt(['email' => $request->email, 'password' => $request->password])) { return response()->json([ 'response' => 'success', 'result' => [ 'token' => $token, ], ]); } return response()->json([ 'response' => 'error', 'message' => 'invalid_email_or_password', ],400); } public function logout() { if(Auth::check() == false) { return response()->json([ 'status' => false, 'message' => 'Unauthorized' ], 401); } Auth::guard('api')->logout(); return response()->json([ 'message' => 'Successfully logged out' ],200); } public function refresh() { $token = JWTAuth::getToken(); try { $token = JWTAuth::refresh($token); return response()->json(['token' => $token], 200); } catch (\Throwable $th) { return response()->json($th, 400); } } public function user(Request $request) { if(Auth::check()) { return response()->json([ 'status' => true, 'response' => Auth::user(), ], 200); } else{ return response()->json([ 'status' => false, ], 401); } }
}
Bên trên gồm có các hàm như
-
signup() đăng ký tài khoản cho user
-
login() nhận username và password từ $request và xử lý attempt nếu chính xác thì gởi về một token authorization
-
logout() đăng xuất user
-
refresh() để sẽ tạo một token mới cho user hiện tại.
-
user() để lấy thông tin của user đang login.
Tiếp đến ta tạo route trong file routes/api.php
Route::namespace('Api')->group(function(){ Route::post('login', '_@.com'); Route::post('signup', '_@.com'); Route::post('logout', '_@.com'); Route::get('user', '_@.com'); });
Chạy với Postman
Ok, cũng ổn phết rồi đấy giờ ta dùng Postman để test xem nào
-
SignUp
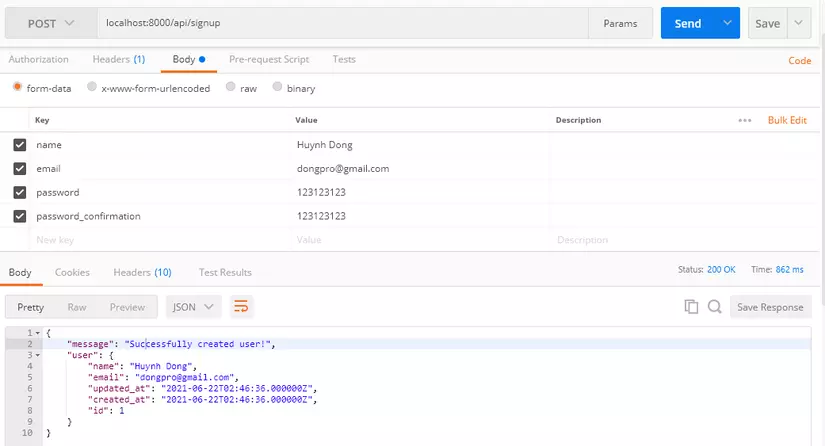
-
Login
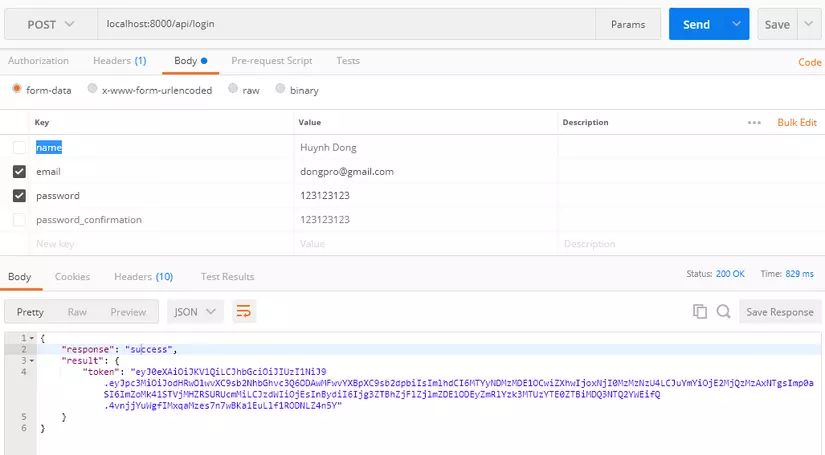
Sau khi đăng nhập xong ta nhận được một cái token đúng không nào, nhớ giữ nó lại nhé.
-
Để get user ta phải thêm 1 field là Authorization ở Headers, field này có value là Bearer "Your token" chúng ta sẽ sử dụng nó trong suốt thời gian login nhé
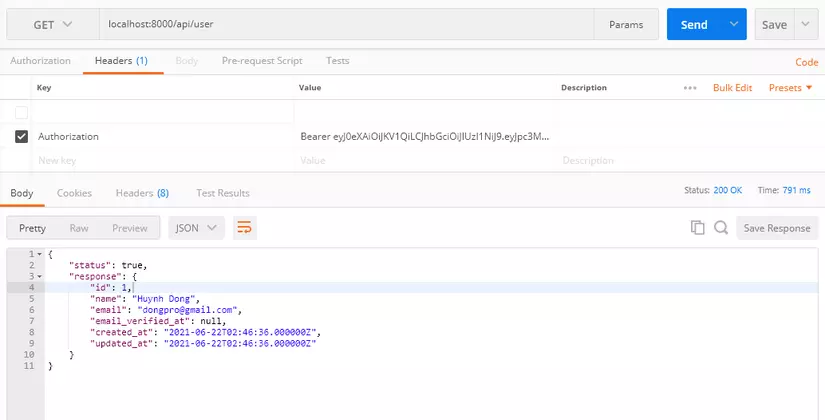
-
Logout
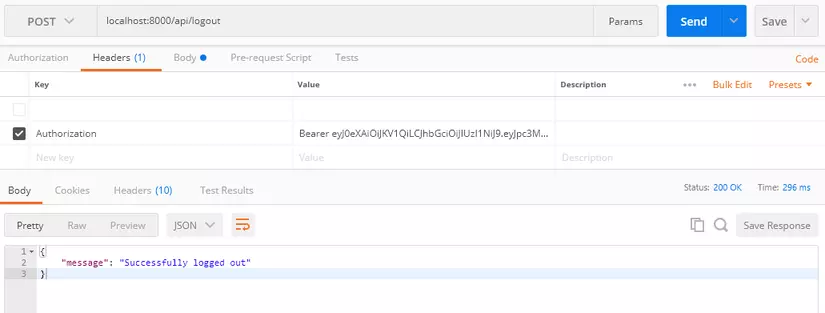
Tạo nhanh 1 CRUD
Ta tạo một model, migration như sau php artisan make:model Task -m
Tạo một resource controller như sau php artisan make:controller Api/TaskController -r --model="Task"
Trong app/Task.php ta viết như sau:
protected $fillable = ['user_id','name']; /** * Get the user that owns the Task * * @return \Illuminate\Database\Eloquent\Relations\BelongsTo */
public function user()
{ return $this->belongsTo(User::class);
}
Trong app/User.php thêm đoạn sau:
/** * Get all of the tasks for the User * * @return \Illuminate\Database\Eloquent\Relations\HasMany */
public function tasks()
{ return $this->hasMany(Comment::class);
}
Trong file migration của Task ta viết và chạy lệnh php artisan migrate:
Schema::create('tasks', function (Blueprint $table) { $table->id(); $table->foreignId('user_id')->constrained('users'); $table->string('name'); $table->timestamps();
});
Trong file controller vừa tạo:
<?php namespace App\Http\Controllers\Api; use Illuminate\Support\Facades\Validator;
use App\Http\Controllers\Controller;
use App\Task;
use Illuminate\Http\Request; class TaskController extends Controller
{ /** * Display a listing of the resource. * * @return \Illuminate\Http\Response */ public function index() { return response()->json(Task::all(), 200); } /** * Show the form for creating a new resource. * * @return \Illuminate\Http\Response */ public function create() { // } /** * Store a newly created resource in storage. * * @param \Illuminate\Http\Request $request * @return \Illuminate\Http\Response */ public function store(Request $request) { $validator = Validator::make($request->all(), [ 'name' => 'required|string|max:255', ]); if($validator->passes()) { $task = Task::create([ 'name' => $request->name ]); return response()->json($task, 200); } return response()->json(['error'=>$validator->errors()->all()]); } /** * Display the specified resource. * * @param \App\Task $task * @return \Illuminate\Http\Response */ public function show(Task $task) { return response()->json($task, 200); } /** * Show the form for editing the specified resource. * * @param \App\Task $task * @return \Illuminate\Http\Response */ public function edit(Task $task) { // } /** * Update the specified resource in storage. * * @param \Illuminate\Http\Request $request * @param \App\Task $task * @return \Illuminate\Http\Response */ public function update(Request $request, Task $task) { $validator = Validator::make($request->all(), [ 'name' => 'required|string|max:255', ]); if($validator->passes()) { $task->name = $request->name; $task->save(); return response()->json($task, 200); } return response()->json(['error'=>$validator->errors()->all()]); } /** * Remove the specified resource from storage. * * @param \App\Task $task * @return \Illuminate\Http\Response */ public function destroy(Task $task) { $task->delete(); return response()->json([ 'message' => 'success' ], 200); }
}
Ta viết route cho api trên
Route::namespace('Api')->group(function(){ Route::post('login', '_@.com'); Route::post('signup', '_@.com'); Route::middleware('auth:api')->group(function() { Route::get('user', '_@.com'); Route::post('logout', '_@.com'); Route::apiResource('tasks','TaskController'); }); });
Tiếp đến ta tạo dữ liệu test bằng factory và seeder, tạo như thế nào thì các bạn xem bài này nhé https://viblo.asia/p/seeder-va-model-factory-trong-laravel-vyDZOx6Plwj
Rồi ok, giờ test thử xem nào.
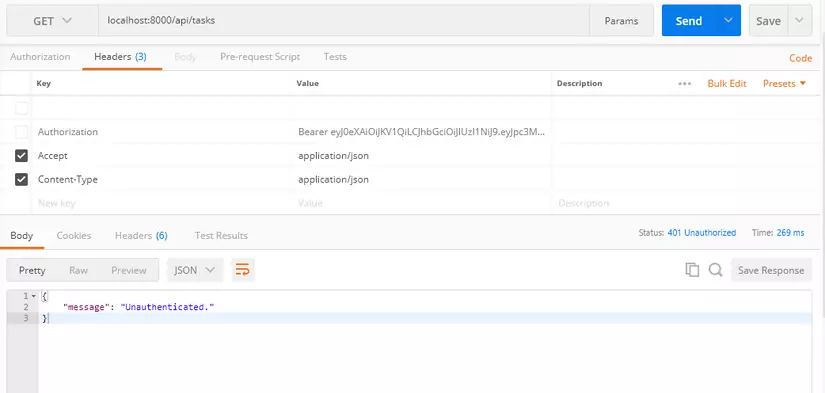
Khi chưa đăng nhập nhưng muốn vào xem tasks, hmm tất nhiên là ko được
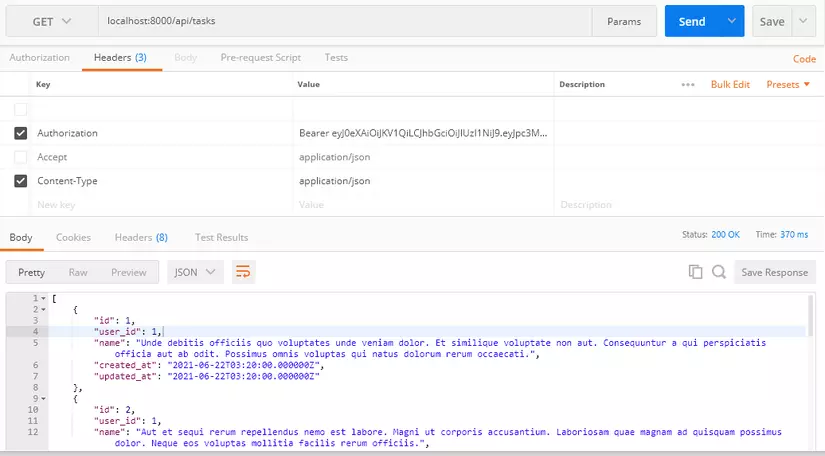
Bây giờ ta đăng nhập rồi thử lại nhé.
Các chức năng còn lại như, thêm sửa xóa bạn có thể tự thực hành nhé.
Tham Khảo : https://www.positronx.io/laravel-jwt-authentication-tutorial-user-login-signup-api/