Hôm nay, mình sẽ dành thời gian để viết 1 bài Hands-on đơn giản về Terraform - Một công cụ để viết Infrastructrure as Code. Bài viết này nội dung khá là (Nhập môn)
- Đối tượng: Các bạn đang có ý định tìm hiểu về Terraform,
- Nội dung: Hands-on setup Terraform với Google Cloud Platform (GCP) và provisioning 1 VM đơn giản
Cài đặt Terraform ( 2 cách)
Cách 1: Cài đặt thủ công
Các bạn vào trang chủ Terraform và tải binary file về máy là có thể sử dụng được luôn.
- Windows: phải thêm đường dẫn tới binary file vào environment variables PATH
- Linux: thêm vào /usr/local/bin
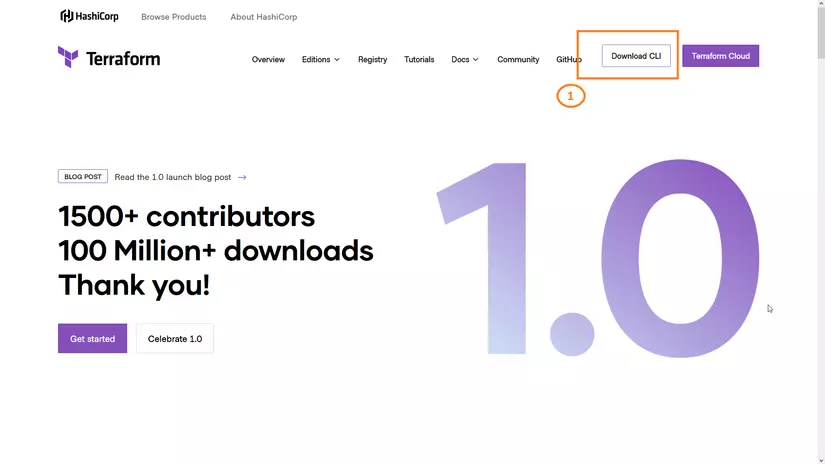
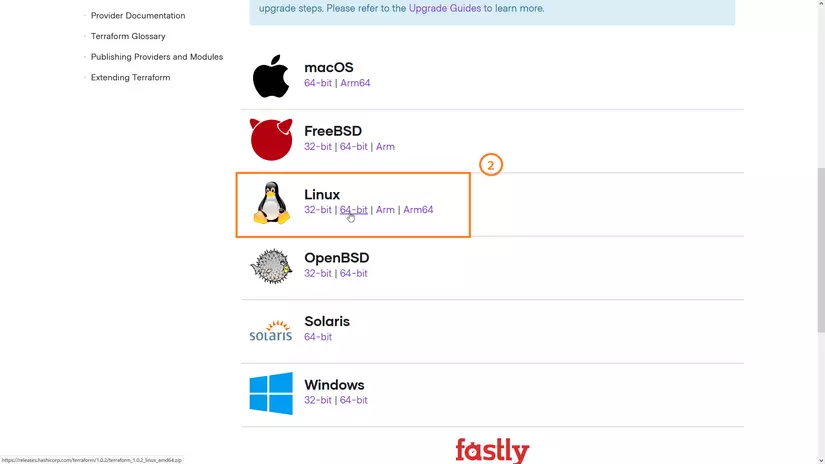
Trong môi trường của mình, thì mình sẽ tải binary file cho Linux 64-bit.
Cách 2: Sử dụng tfenv
https://github.com/tfutils/tfenv
Đây là công cụ để quản lý 1 lúc nhiều version của Terraform. Bởi vì terraform cập nhật version khá thường xuyên.
Cách cài thì các bạn có thể tham khảo README, viết khá dễ hiểu.
Mình sẽ để lại các command để cài đặt trong môi trường linux nha.
sudo apt-get install -y unzip
git clone https://github.com/tfutils/tfenv.git ~/.tfenv
sudo ln -s ~/.tfenv/bin/* /usr/local/bin
tfenv install latest
tfenv use latest
terraform version
Hiện tại thì phiên bản mới nhất của Terraform là 1.0.1.
Setup Terraform Provider
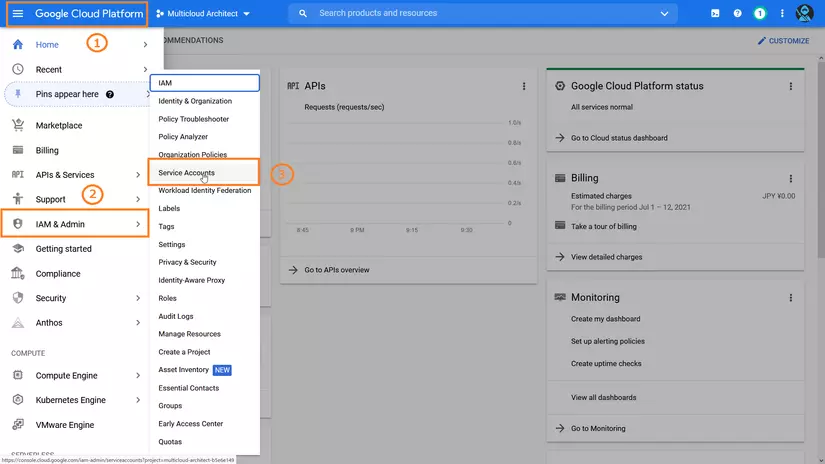
1. Tạo Service Account và JSON Credentials file
Service Account là cách mà 1 program liên kết với GCP (Không chỉ terraform, mà khi bạn dev một chương trình nào đó thì cũng nên sử dụng Service Account để liên kết nha)
Mở giao diện tạo Service Account của GCP
Ấn "Create Service Account"
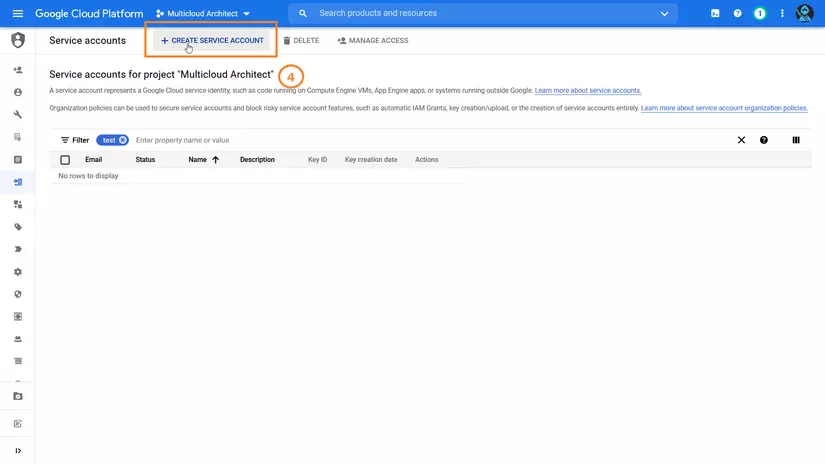
Điền một số thông tin cơ bản
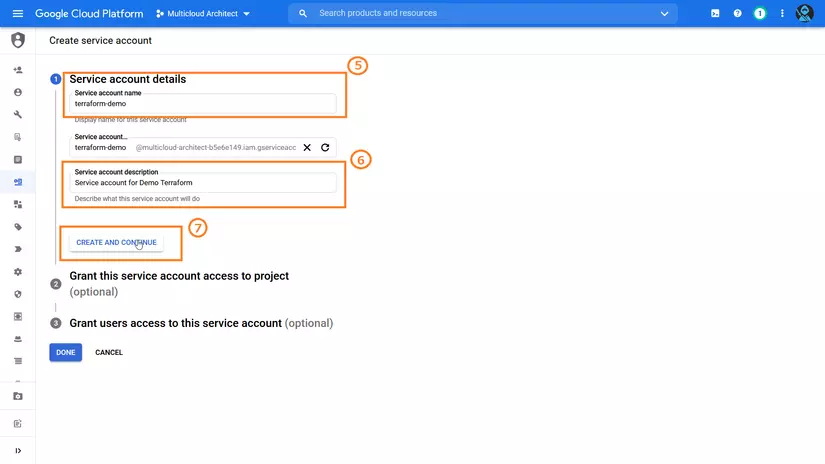
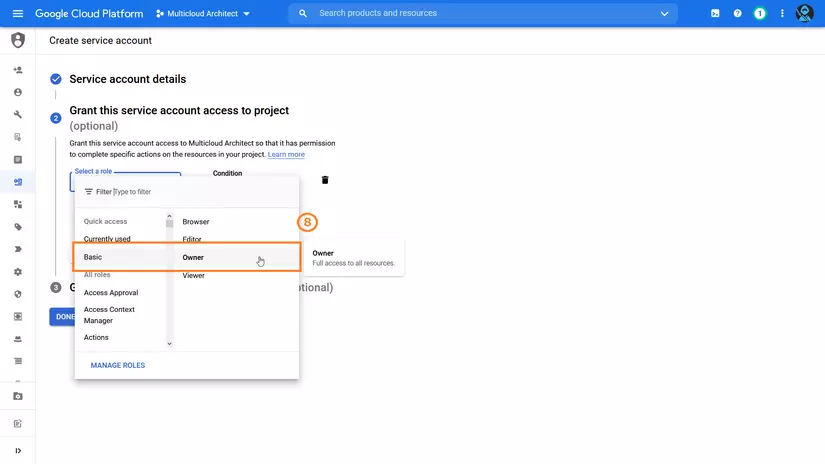
Chọn IAM Role: Owner** (Lưu ý: Chỉ set trong môi trương Development, không sử dụng role này cho môi trường Production)**
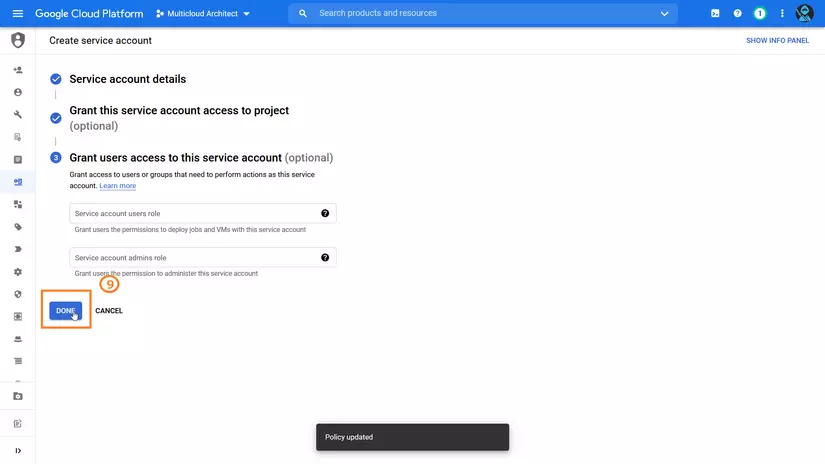
Hoàn tất tạo Service Account
Chọn Manage Keys cho Service Account vừa tạo
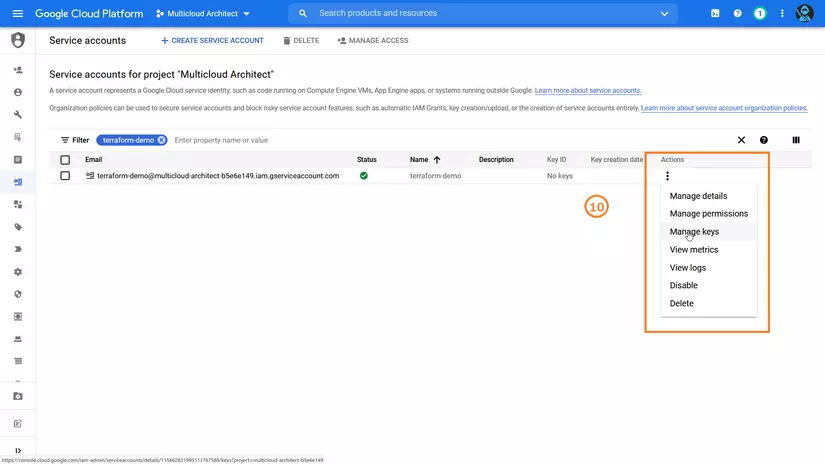
Tạo Key file "Create new Key"
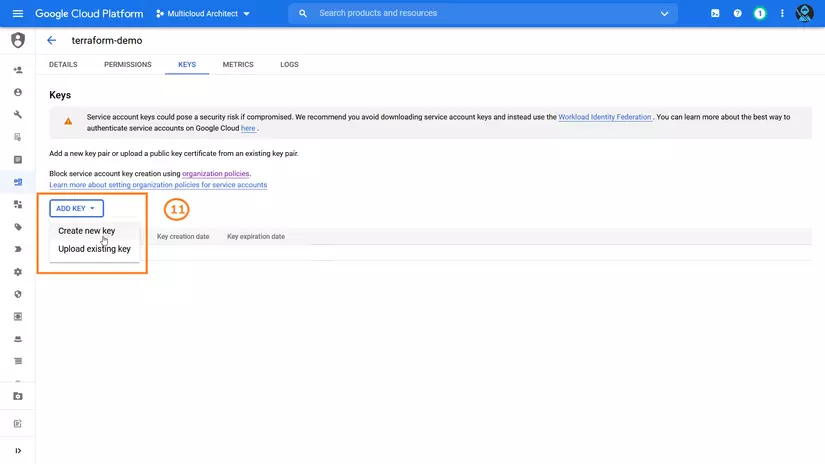
Tải JSON và lưu vào workspace code
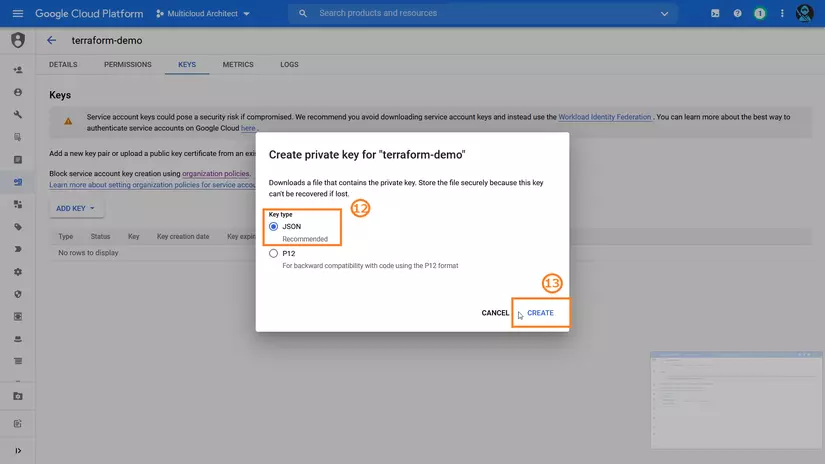
Vậy là chúng ta đã có JSON Credential File để Terraform sử dụng.
2. Setting Google Provider với Service Account
Để Terraform có thể kết nối với Google Cloud Platform, chúng ta sẽ sử dụng Google Provider + Service Account JSON credentials file
Read more: https://registry.terraform.io/providers/hashicorp/google/latest/docs
Code liên quan đến provider mình sẽ thêm vào file provider.tf như sau:
provider "google" { project = "<< GCP PROJECT ID >>" region = "<< GCP REGION >>" credentials = "<< GCP CREDENTIAL FILE PATH >>"
}
Trong môi trường của mình, các tham số có giá trị như sau:
- << GCP PROJECT ID >>:
multicloud-architect-b5e6e149 - << GCP REGION >>:
asia-northeast1 - << GCP CREDENTIAL FILE PATH >>:
multicloud-architect-terraform-demo-b5e6e149-fdfedd77d7ff.json
Kết quả là:
provider "google" { project = "multicloud-architect-b5e6e149" region = "asia-northeast1" credentials = "multicloud-architect-terraform-demo-b5e6e149-fdfedd77d7ff.json"
}
Set up provider thì chỉ vài dòng thế này thôi. Tiếp theo mình sẽ chạy command:
terraform init
để khởi tạo workspace của mình, output sẽ tương tự như sau:
_@.com:~/terraform-gcp/001$ terraform init Initializing the backend... Initializing provider plugins...
- Reusing previous version of hashicorp/google from the dependency lock file
- Installing hashicorp/google v3.74.0...
- Installed hashicorp/google v3.74.0 (signed by HashiCorp) Terraform has been successfully initialized! You may now begin working with Terraform. Try running "terraform plan" to see
any changes that are required for your infrastructure. All Terraform commands
should now work. If you ever set or change modules or backend configuration for Terraform,
rerun this command to reinitialize your working directory. If you forget, other
commands will detect it and remind you to do so if necessary.
Giải thích một chút thì:
- Terraform sẽ tìm phiên bản mới nhất của Google Provider
- Tải phiên bản 3.74.0 của Google Provider về thư mục .terraform
- Tạo lock file .terraform.lock.hcl
Nếu không có lỗi gì thì sẽ là Terraform has been successfully initialized!
Provisioning Google Compute Engine Instance
1. Cấp phép sử dụng Compute Engine API trên GCP
Terraform liên kết với GCP thông qua API và trong bài này mình muốn tạo Google Compute Engine Instance nên mình cần cấp phép Compute Engine API trong GCP project của mình.
-
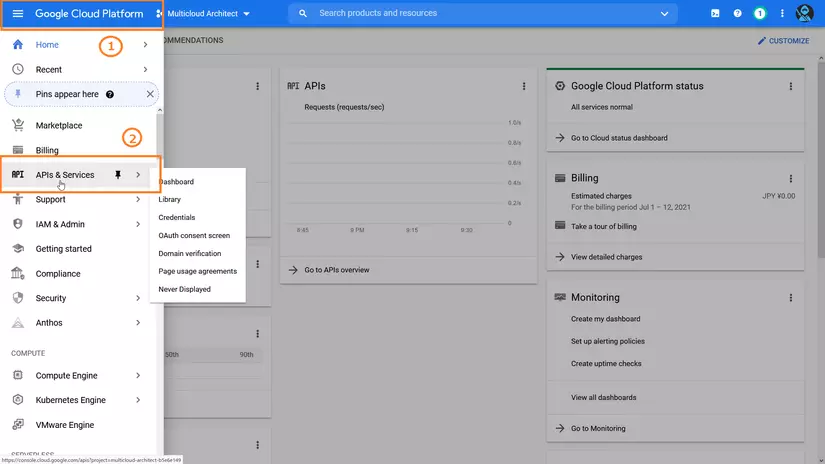
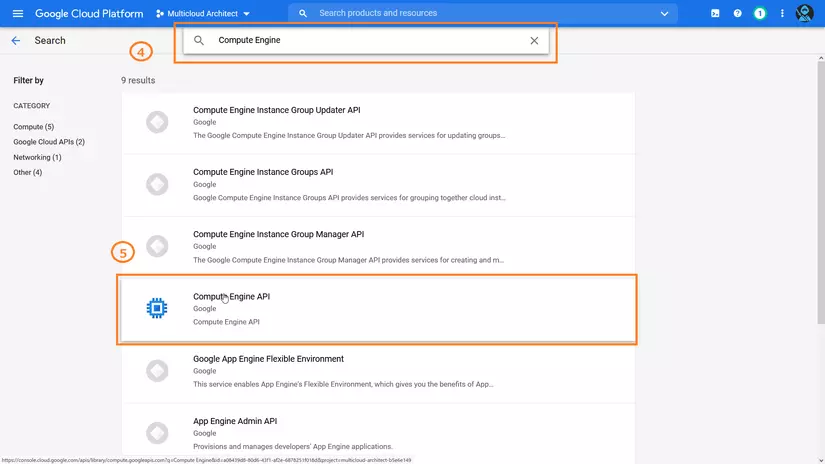
Mở giao diện API & Services (Quản lý API)
-
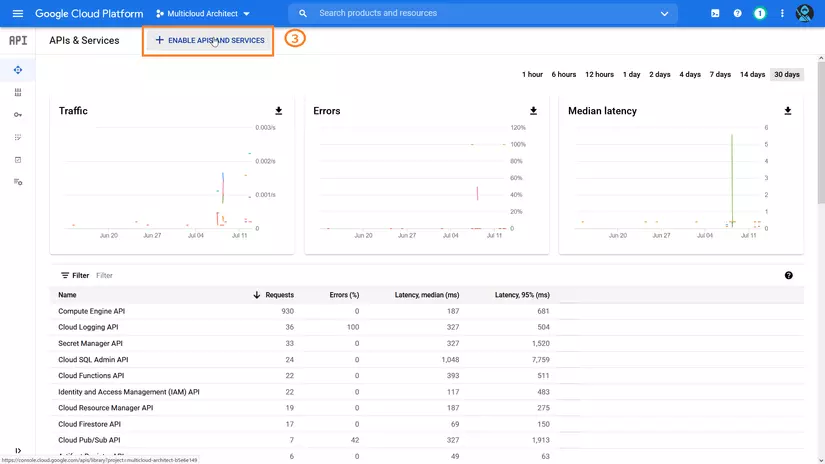
Ấn Enable APIs AND Services
-
Gõ tìm kiếm "Compute Engine"
-
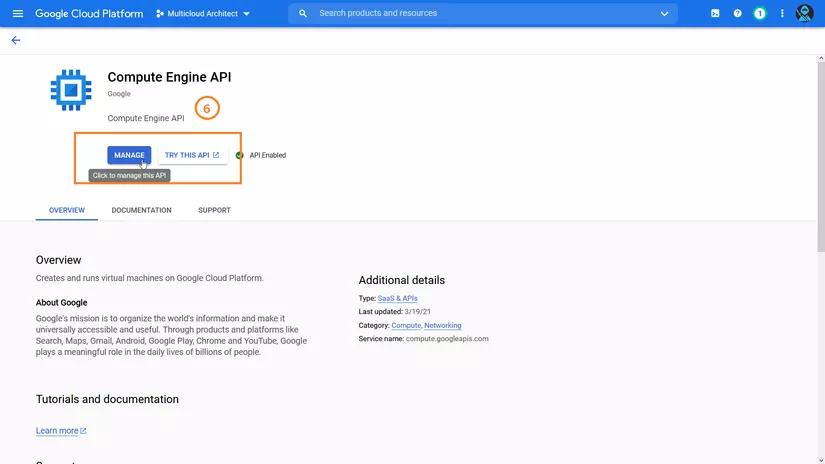
Ấn nút Enable (Trong TH của mình vì mình đã cấp phép nên nút đó đổi thành Manage)
2. Viết code main.tf
https://registry.terraform.io/providers/hashicorp/google/latest/docs/resources/compute_instance
Các bạn có thể copy sample code trong document về Compute Engine và sửa lại một chút. Code cuối của mình sẽ như sau:
resource "google_service_account" "default" { account_id = "demo-gce-sa" display_name = "Service Account for Demo"
} resource "google_compute_instance" "default" { name = "demo-terraform-instance" machine_type = "e2-medium" zone = "asia-northeast1-b" tags = ["http-server", "https-server"] boot_disk { initialize_params { image = "debian-cloud/debian-10" } } network_interface { network = "default" access_config { // Ephemeral IP } } metadata = { foo = "bar" } metadata_startup_script = "apt-get update -y && apt-get install -y nginx" service_account { # Google recommends custom service accounts that have cloud-platform scope and permissions granted via IAM Roles. email = google_service_account.default.email scopes = ["cloud-platform"] }
}
Bạn sẽ đổi một số các thông tin như (song song đối chiếu với document để hiểu về ý nghĩa của các argument này nha):
- name
- zone
- image
- metadata
- metadata_startup_script
3. Kiểm tra execution plan và deploy
Về cơ bản thì Execution Plan là cách bạn kiểm tra xem code Terraform chạy có vấn đề gì hay không, infrastructure sẽ thay đổi như thế nào.
Trong Execution Plan sẽ bao gồm các actions mà Terraform thực hiện để tạo/thay đổi Infrastructure của anh em.
Lấy ví dụ với code ở trong Bước 2 thì sẽ có execution plan như sau:
terraform plan
Kết quả: (+ ........... là chỗ mình đã cố tình lược bỏ bớt cho đỡ dài)
Terraform used the selected providers to generate the following execution plan. Resource actions are
indicated with the following symbols: + create Terraform will perform the following actions: # google_compute_instance.default will be created + resource "google_compute_instance" "default" { + ........... + guest_accelerator = (known after apply) + id = (known after apply) + ........... + metadata_fingerprint = (known after apply) + metadata_startup_script = "apt-get update -y && apt-get install -y nginx" + ........... + service_account { + email = (known after apply) + scopes = [ + "https://www.googleapis.com/auth/cloud-platform", ] } } # google_service_account.default will be created + resource "google_service_account" "default" { + account_id = "demo-gce-sa" + display_name = "Service Account for Demo" + email = (known after apply) + id = (known after apply) + name = (known after apply) + project = (known after apply) + unique_id = (known after apply) } Plan: 2 to add, 0 to change, 0 to destroy.
google_compute_instance.default will be createdgoogle_service_account.default will be createdPlan: 2 to add, 0 to change, 0 to destroy.
Output theo mình thấy thì khá dễ hiểu, khi nhìn vào các bạn có thể thấy ngay các actions mà Terraform sẽ thực hiện, ở đây Terraform sẽ tạo 2 resource lần lượt là: compute_instance và service_account.
Sau khi đã kiểm tra xong execution plan, nếu không có vấn đề gì thì các bạn sẽ gõ command:
terraform apply
để deploy/provision infrastructure lên GCP.
Khi chạy terraform apply thì Terraform cũng in ra Execution Plan và kèm 1 câu hỏi yes/no. Nếu không có vấn đề gì thì bạn sẽ trả lời Yes để deploy.
 Enter a value: yes google_service_account.default: Creating...
google_service_account.default: Creation complete after 2s [id=projects/multicloud-architect-b5e6e149/serviceAccounts/_@.comm]
google_compute_instance.default: Creating...
google_compute_instance.default: Still creating... [10s elapsed]
google_compute_instance.default: Still creating... [20s elapsed]
google_compute_instance.default: Creation complete after 25s [id=projects/multicloud-architect-b5e6e149/zones/asia-northeast1-b/instances/demo-terraform-instance] Apply complete! Resources: 2 added, 0 changed, 0 destroyed.
Sau khi deploy thành công thì các bạn có thể mở giao diện GCP Compute Engine và kiểm tra.
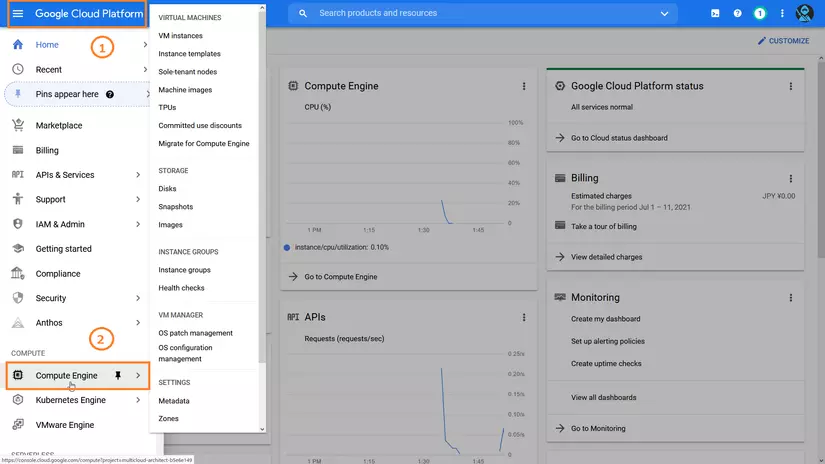 Mở menu (1) và chọn Compute Engine (2)
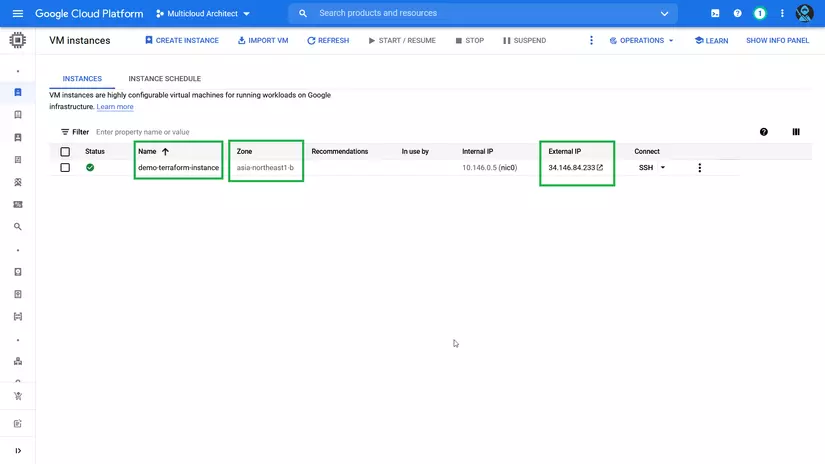
- Name:
demo-terraform-instance - Zone:
asia-northeast1-b - Ephemeral IP: Giá trị ngẫu nhiên mỗi lần deploy và sẽ thay đổi sau 1 khoảng thời gian nhất định
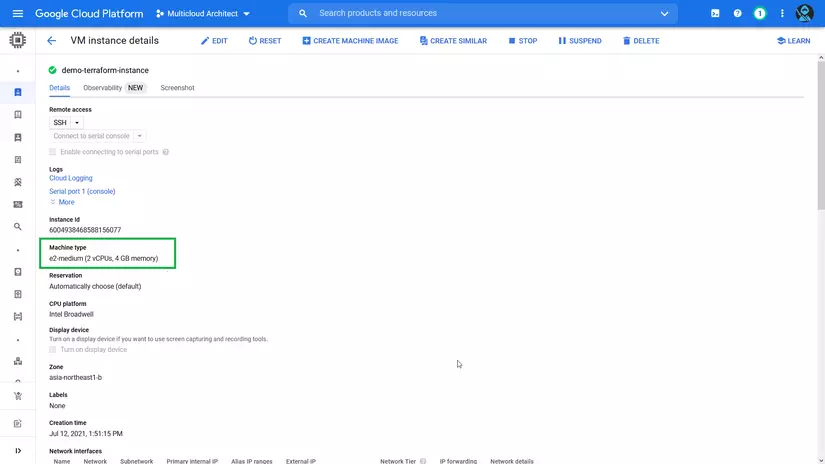
- Machine Type:
e2-medium(Đây là dạng instance khá rẻ)
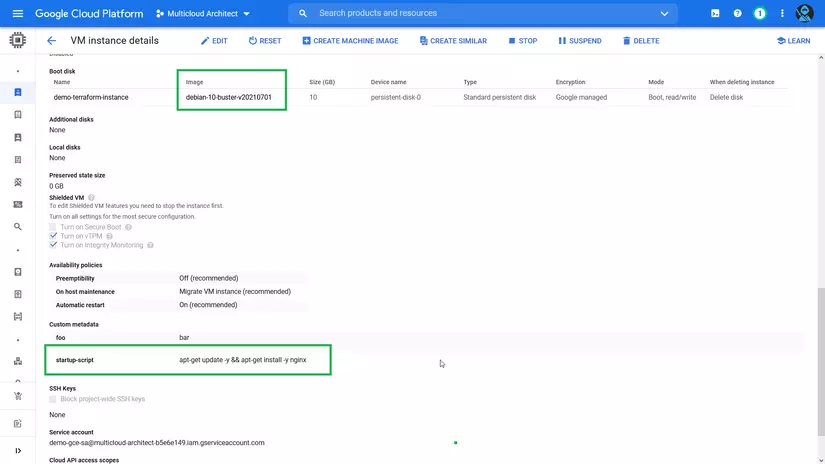
- image:
debian-10-buster - startup-script:
apt-get update -y && apt-get install -y nginx(Cài đặt NGINX khi instance khởi động lần đầu tiên)
Vậy là tại Bước 3 này mình đã hoàn tất tạo một Google Compute Engine instance hoàn toàn bằng Terraform.
Xóa Infrastructure (Nếu không sử dụng)
Vì Google Compute Engine sẽ tính phí theo giờ, nên nếu bạn không sử dụng thì tốt nhất là xóa để tránh phát sinh phí.
Để xóa infrastrutre đã tạo thì chúng ta sẽ dùng command
terraform destroy
Khi chạy terraform destroy thì Terraform sẽ in ra:
- execution plan với các actions là destroy
- 1 câu hỏi yes/no để xác nhận
Nếu không có vấn đề gì thì bạn trả lời Yes để tiền hành xóa infrastructure
Plan: 0 to add, 0 to change, 2 to destroy. Do you really want to destroy all resources? Terraform will destroy all your managed infrastructure, as shown above. There is no undo. Only 'yes' will be accepted to confirm. Enter a value: yes google_compute_instance.default: Destroying... [id=projects/multicloud-architect-b5e6e149/zones/asia-northeast1-b/instances/demo-terraform-instance]
google_compute_instance.default: Still destroying... [id=projects/multicloud-architect-b5e6e149/...t1-b/instances/demo-terraform-instance, 10s elapsed]
google_compute_instance.default: Still destroying... [id=projects/multicloud-architect-b5e6e149/...t1-b/instances/demo-terraform-instance, 20s elapsed]
google_compute_instance.default: Destruction complete after 22s
google_service_account.default: Destroying... [id=projects/multicloud-architect-b5e6e149/serviceAccounts/_@.comm]
google_service_account.default: Destruction complete after 0s Destroy complete! Resources: 2 destroyed.
Vậy là xong, sử dụng Terraform, mình có thể tạo hay xóa infra đều cực kì nhanh và quan trọng là bằng Code.
Sau khi làm xong demo này bạn sẽ chỉ tốn tầm 0.01$ thôi nha.
Nếu bạn mới sử dụng GCP thì sẽ được cho 300$ nên coi như là free luôn.
Mọi người có thể ủng hộ mình bằng cách like và subcribe kênh Youtube của mình nha. 

Ngoài ra, các bạn có thể liên lạc mình qua Facebook
Cảm ơn các bạn! Arigatou Gozaimasu!