Form luôn là 1 thành phần không thể thiếu trong mỗi website, với các trường nhập liệu ta luôn phải xử lý validate. Trong react js nếu xử lý 1 cách cơ bản thì với mỗi field trong form khi validate lại luôn cần phải có các state lưu giá trị, lưu lỗi, các funtion xử lý lỗi phức tạp gây tốn kém thời gian cho lập trình viên  . Cùng tìm hiểu Formik, 1 thư viện sinh ra để giải quyết vấn đề này
  .
.
1. Khởi tạo form với formik
FormikProps cung cấp rất nhiều các prop để tương tác với form, ở đây mình sẽ nói về các prop cơ bản.
- Formik sử dụng context trong react js để lưu các giá trị, lỗi, trạng thái touched,... để truyền qua các element bên trong.
- Formik cung cấp 2 function handleChange và handleBlur để binding các giá trị thông qua prop name hoặc id của component nhập liệu.
- Cần khai báo prop initialValues cho Formik để bind các dữ liệu khởi tạo vào các field
- Xử lý submit form với hàm callback onSubmit của Formik
Cở bản chúng ta sẽ có 1 form như sau:
import './App.css';
import { Formik } from 'formik'; function App() { return ( <div className="App"> <div className="form"> <Formik initialValues={{ name: '' }} onSubmit={(values, { setSubmitting }) => { setTimeout(() => { alert(JSON.stringify(values, null, 2)); setSubmitting(false); }, 400); }} > {({ values, errors, touched, handleChange, handleBlur, handleSubmit, isSubmitting, }) => { console.log({ values, errors, touched, isSubmitting }); return ( <form onSubmit={handleSubmit}> <label htmlFor="name">Name</label> <input onBlur={handleBlur} onChange={handleChange} name="name" id="name" /> <br /> <label htmlFor="address">Address</label> <input onBlur={handleBlur} onChange={handleChange} name="address" id="address" /> <br /> <button type="submit" disabled={isSubmitting}> Submit </button> </form> ); }} </Formik> </div> </div> );
} export default App;
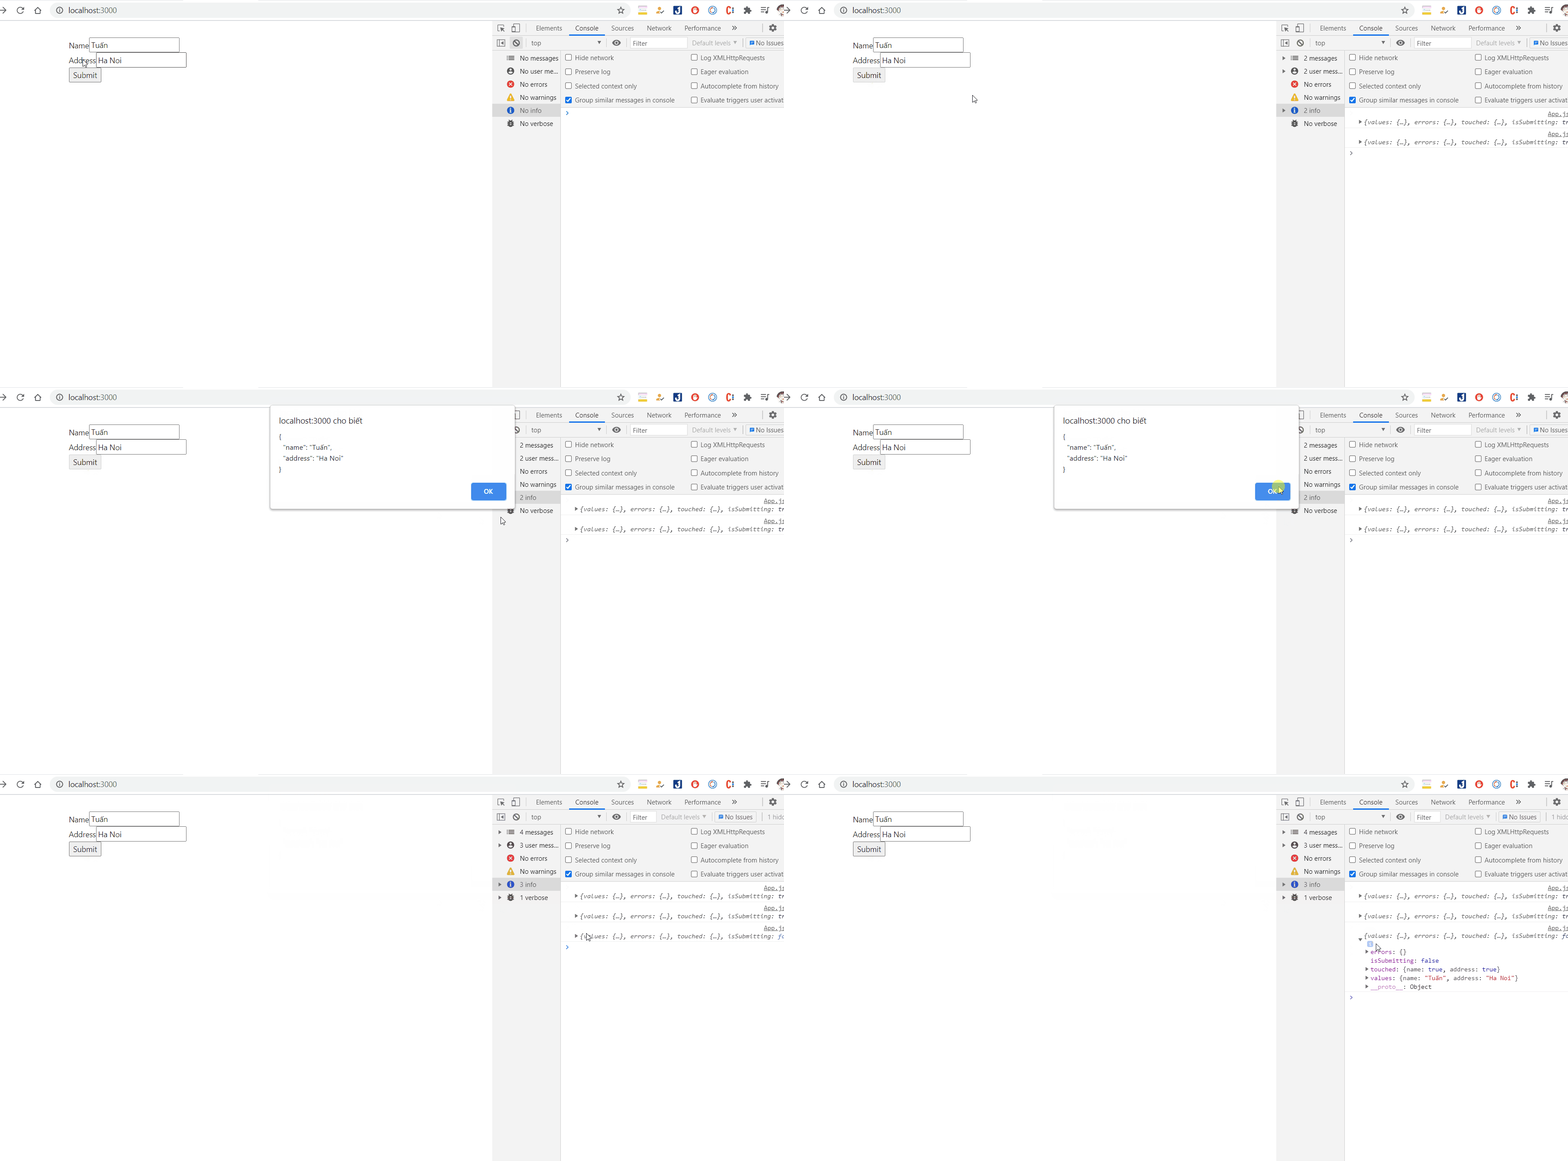
Cơ bản mình sẽ được 1 chiếc form xấu xấu như này  (bên mình sẽ giới thiệu về custom field cho đẹp hơn)

Ở bên trên ta thấy ở mỗi field ta đều phải bind lại các hàm handleBlur và handleChange cũng như giao diện của mình khá là xấu, tiếp theo mình sẽ tạo custom field trong formik để trông đẹp hợp và tối ưu hơn.
2. Tạo custom field trong formik
Để tạo custom field, formik cung cấp cho ta 2 component là FastField và Field. FastField sử dụng pure component sẽ chỉ render lại khi giá trị của field thay đổi, Field sẽ render lại mỗi khi có sự thay đổi của field bất kỳ trong form.
- Field và FastField sẽ nhận 2 tham số bắt buộc là name (dùng bind dữ liệu) và component (dùng hiển thị giao diện)
- Component dùng trong Field và FastField sẽ nhận các thông tin field (các thông tin, hàm binding tương ứng với field đó), form (các thông tin và hàm tương tác với form) thông qua 2 props field, form
Ở đây mình dùng thư viện ant-design và sử dụng các field input của thư viện này.
File InputField.js
import React from 'react';
import PropTypes from 'prop-types';
import { Form, Input } from 'antd'; InputField.propTypes = {}; function InputField(props) { const { field, form, label, placeholder } = props; const { name, value, onChange, onBlur } = field; return ( <> <Form.Item label={label} name={name} value={value} onChange={onChange} onBlur={onBlur} placeholder={placeholder} > <Input /> </Form.Item> </> );
} export default InputField;
File App.js
import './App.css';
import { FastField, Formik } from 'formik';
import InputField from './InputField';
import { Button } from 'antd'; function App() { return ( <div className="App"> <div className="form"> <Formik initialValues={{ name: '' }} onSubmit={(values, { setSubmitting }) => { setTimeout(() => { alert(JSON.stringify(values, null, 2)); setSubmitting(false); }, 400); }} > {({ values, errors, touched, handleSubmit, isSubmitting }) => { console.log({ values, errors, touched, isSubmitting }); return ( <form onSubmit={handleSubmit}> <FastField label={'Name'} name="name" component={InputField} /> <FastField label={'Address'} name="address" component={InputField} /> <Button htmlType="submit" disabled={isSubmitting}> Submit </Button> </form> ); }} </Formik> </div> </div> );
} export default App;
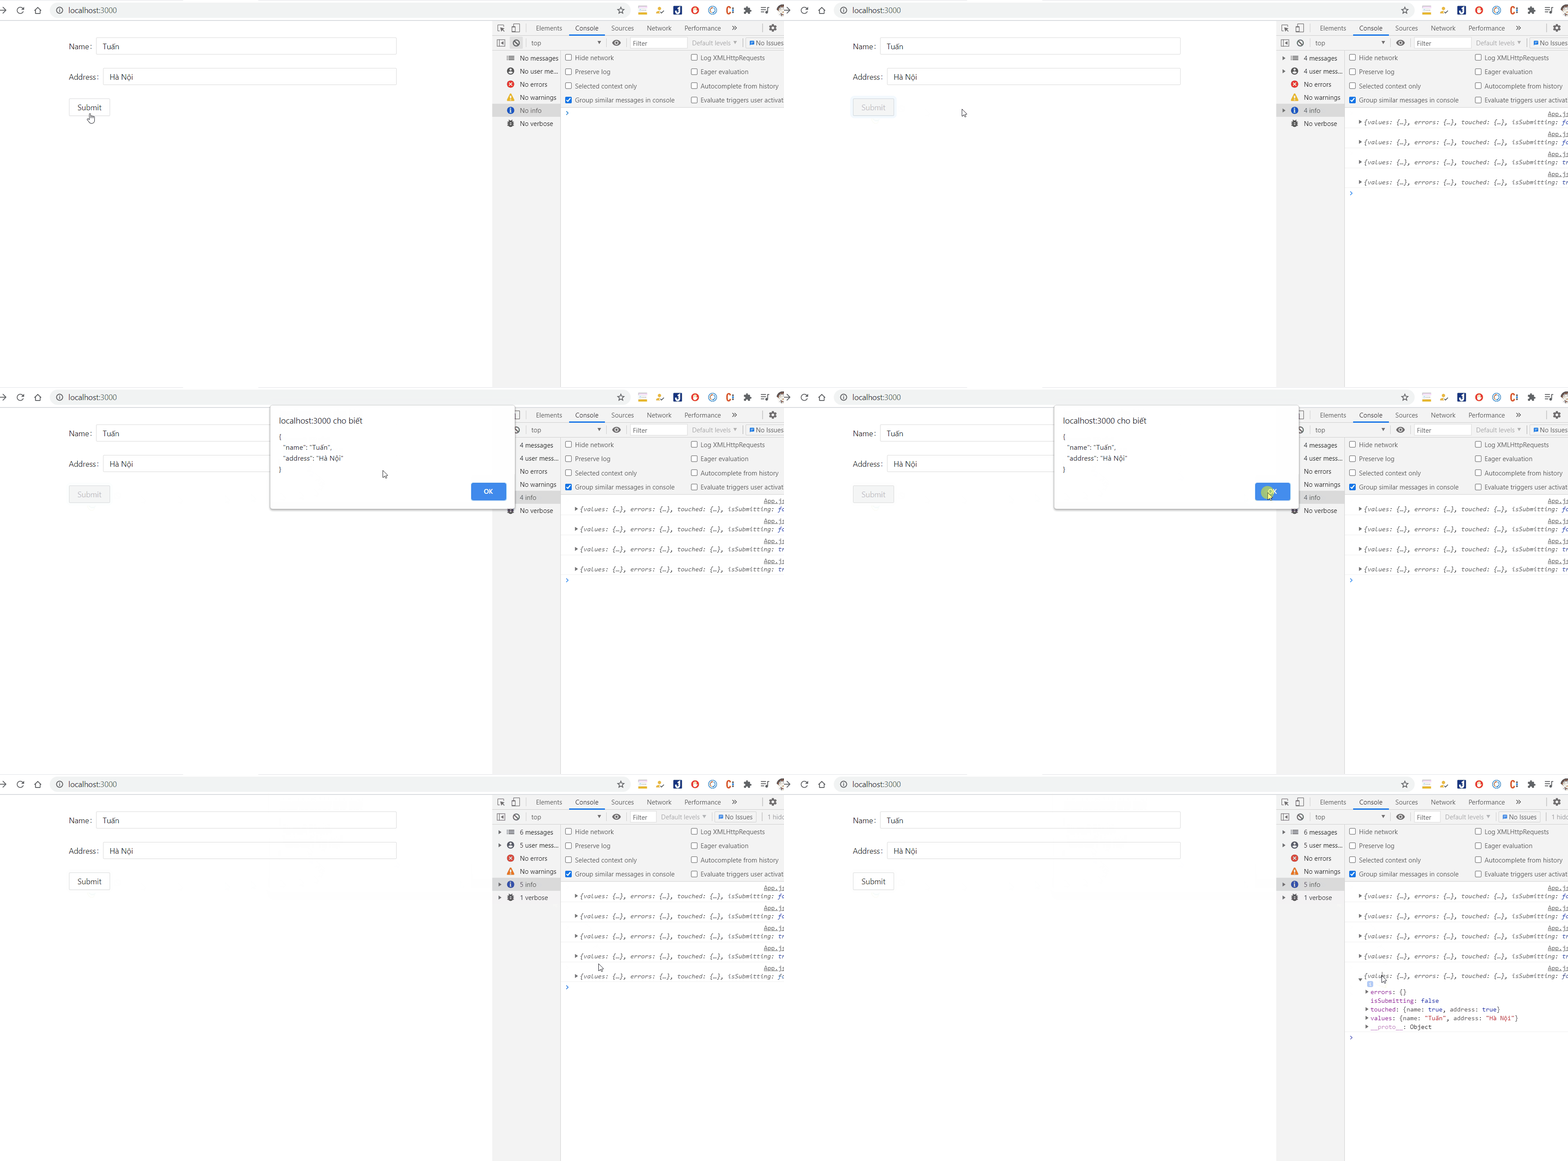
Chiếc form của mình giờ đã đẹp hơn nhờ anh ant-design 

Đã đẹp hơn rồi nhưng với form đẹp là chưa đủ, ta còn cần phải validate các trường nhập liệu trong form.
3. Validate form trong Formik
Để validate form trong formik ta sử dụng prop validate props này nhận vào 1 funtion callback với tham số là thông tin các value trong form và trả về object lỗi của các field tương ứng.
Sửa lại file InputField.js thêm các xử lý message và ô input khi có lỗi nhận từ form vừa file tương ứng.
import React from 'react';
import PropTypes from 'prop-types';
import { Form, Input } from 'antd'; InputField.propTypes = {}; function InputField(props) { const { field, form, label, placeholder, required } = props; const { name, value, onChange, onBlur } = field; const { errors, touched } = form; return ( <> <Form.Item label={label} name={name} value={value} onChange={onChange} onBlur={onBlur} placeholder={placeholder} required={required} validateStatus={touched[name] && errors[name] ? 'error' : 'success'} help={touched[name] && errors[name] ? errors[name] : ''} > <Input /> </Form.Item> </> );
} export default InputField;
Sửa file App.js thêm funtion handleValidate để xử kiểm tra lỗi trong form
import './App.css';
import { FastField, Formik } from 'formik';
import InputField from './InputField';
import { Button } from 'antd'; function App() { /** * Xử lý validate các trường trong form * @param {*} values giá trị của các trường trong form */ const handleValidate = function (values) { const errors = {}; if (!values.name) { errors.name = 'Required !'; } if (!values.address) { errors.address = 'Required !'; } if (!values.email) { errors.email = 'Required !'; } else if (!/^[A-Z0-9._%+-]_@.com[A-Z0-9.-]+\.[A-Z]{2,}$/i.test(values.email)) { errors.email = 'Invalid email address !'; } return errors; }; return ( <div className="App"> <div className="form"> <Formik initialValues={{ name: '', address: '', email: '' }} onSubmit={(values, { setSubmitting }) => { setTimeout(() => { alert(JSON.stringify(values, null, 2)); setSubmitting(false); }, 400); }} validate={handleValidate} > {({ values, errors, touched, handleSubmit, isSubmitting }) => { console.log({ values, errors, touched, isSubmitting }); return ( <form onSubmit={handleSubmit}> <FastField label={'Name'} name="name" component={InputField} /> <FastField label={'Address'} name="address" component={InputField} /> <FastField label={'Email'} name="email" component={InputField} /> <Button htmlType="submit" disabled={isSubmitting}> Submit </Button> </form> ); }} </Formik> </div> </div> );
} export default App;
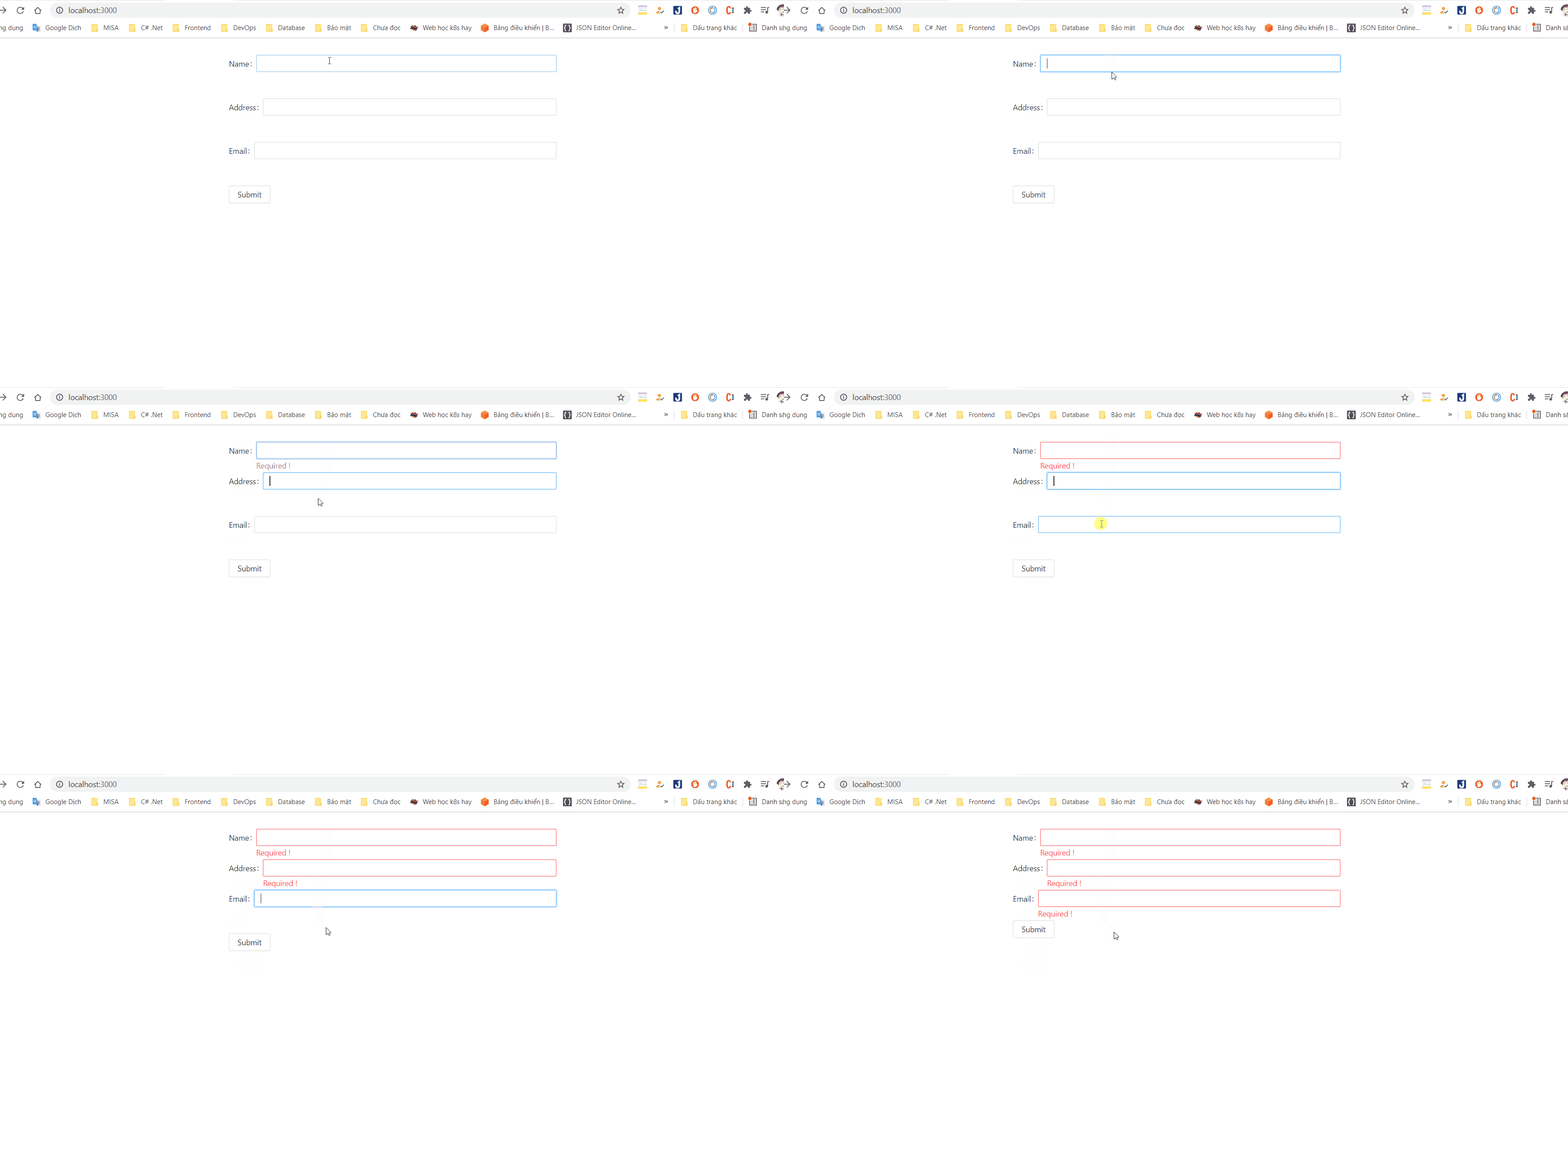
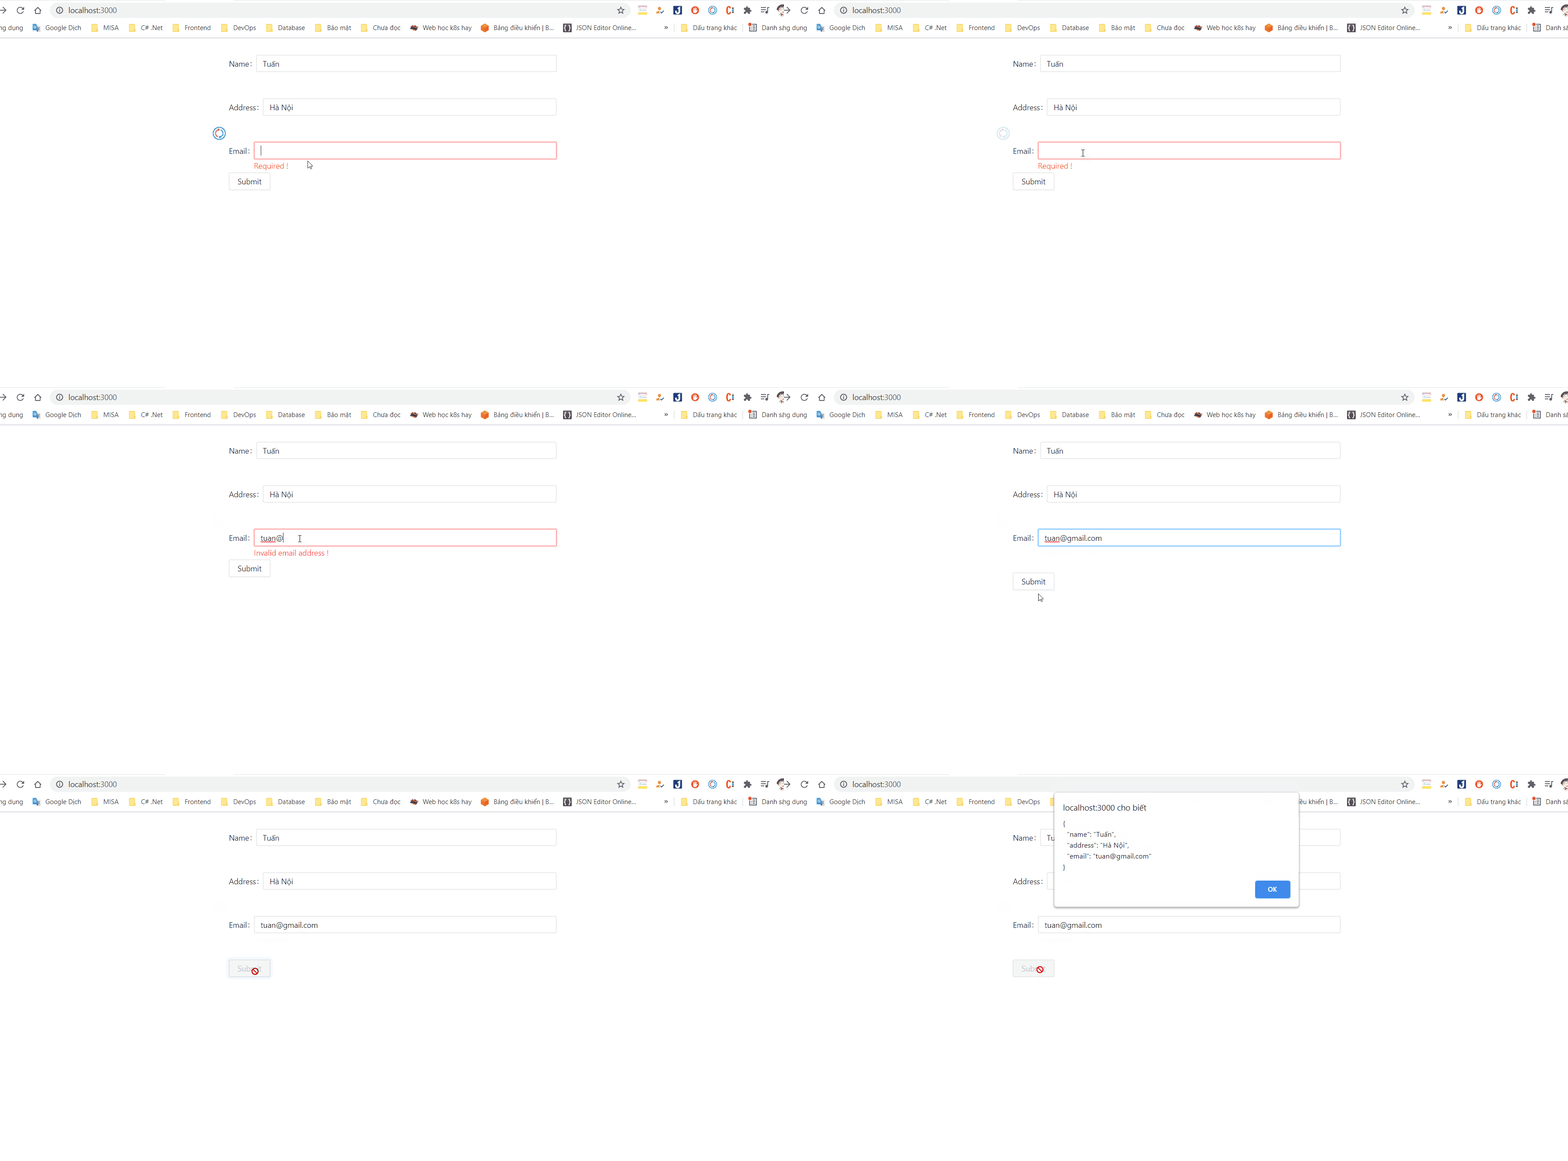
Bây giờ ta có 1 chiếc form đẹp chuẩn 


Trên đây là những chia sẻ của mình về xử lý form trong react với Formik. Hãy đưa ra ý kiến dưới comment để mình bổ sung và hoàn thiện hơn nhé. ?
