Mã hóa dữ liệu trên Google Drive sử dụng Google Colab
1.Giới thiệu
Google Drive là một trong những dịch vụ lưu trữ đám mây phổ biến nhất hiện nay. Tuy nhiên, nếu bạn muốn bảo vệ các tệp quan trọng trên Google Drive của mình thì mã hóa là một phương pháp hữu hiệu. Đối với người dùng business thì được hỗ trợ mã hóa Server-Client, nhưng với tài khoản cá nhân thì không, nếu sử dụng các công cụ khác thì sẽ tốn phí hoặc nếu không thì tốc độ rất chậm trong việc mã hóa số lượng file nhiều.Trong bài viết này, chúng ta sẽ tìm hiểu cách mã hóa dữ liệu trên Google Drive bằng cách sử dụng Google Colab đáp ứng cho việc mã hóa và nhanh chóng.
2. Cách mã hóa dữ liệu trên Google Drive bằng Google Colab
Tạo project Colab
1. Mở Google Colab: bấm Google Colab để mở Colab
2. Tạo project mới: Tạo mới 1 Project bằng theo tác Menu: File -> New notebook
3. Sau khi tạo Project, thực hiện thêm Code cài đặt các thư viện cho python xử lý các thao tác mã hóa cho ứng dụng:
!pip install pycryptodome pydrive bcrypt
4. Mount drive và tạo các file cơ bản:
from google.colab import drive
drive.mount('/content/drive', force_remount=True)
with open('/content/client_secrets.json', 'w') as fp: pass
Lưu ý: Đối với thao tác mount dữ liệu, bạn sẽ phải đồng ý các quyền để cấp quyền cho ứng dụng truy cập Drive và mount dữ liệu về instance ảo. Cho nên lưu ý không thực hiện đồng ý quyền cho tập tin của người khác nhá.
5. Đường dẫn sau khi mount dữ liệu: Sau khi Mount drive vào Instance, ổ drive của bạn sẽ có đường dẫn "content/drive", các thao tác về sau sẽ để đường dẫn đã mount này làm tiền đề nhé.
6. Tạo code mới và thực hiện import các thư viện cần thiết sau:
import os
from Crypto.Cipher import AES
from Crypto.Random import get_random_bytes
from pydrive.auth import GoogleAuth
from pydrive.drive import GoogleDrive
import hashlib
import bcrypt
from google.colab import auth
from googleapiclient.discovery import build
import time
7. Viết hàm mã hóa mật khẩu để lưu kèm theo tên tập tin: Vì cơ chế mã hóa và giải mã của AES-256 không phân biệt khóa mã hóa và khóa giải mã, cho dù bạn nhập sai khóa giải mã thì chương trình sẽ vẫn giải mã theo khóa giải mã đã nhập sai mà không hề có lỗi xảy ra, tuy nhiên tập tin đã giải mã sẽ không đọc được, hay nói chính xác nó không còn là tập tin ban đầu nữa. Vì thế tập tin đã mã hóa thì trong tên của nó sẽ chứa kèm phần mật khẩu đã mã hóa này và dùng để thực hiện so sánh với mật khẩu khi giải mã.
def hash_password(password): hashed_password = hashlib.sha256(password.encode()).digest() return hashed_password
8. Viết hàm Mã hóa tập tin và nhận Mã hóa thư mục: Về cơ bản, việc mã hóa sẽ làm việc trên tập tin, tuy nhiên để tránh việc chọn quá nhiều tập tin thì mình sẽ viết luôn làm xử lý thư mục, đọc tập tin trong thư mục và mã hóa hàng loạt
def encrypt_file(file_path, password): # Chuyển đổi mật khẩu thành khóa 256-bit (32 bytes) key = hash_password(password) # Các bước mã hóa giữ nguyên không thay đổi salt = get_random_bytes(AES.block_size) cipher = AES.new(key, AES.MODE_CBC, salt) with open(file_path, 'rb') as file: file_data = file.read() padded_data = file_data + (AES.block_size - len(file_data) % AES.block_size) * b' ' encrypted_data = cipher.encrypt(padded_data) hashedPassword = hash_string(password) encrypted_file_path = file_path + '.' + hashedPassword +'.enc' with open(encrypted_file_path, 'wb') as encrypted_file: encrypted_file.write(salt + encrypted_data) def encrypt_directory(directory_path, password): for dir_path, dir_names, file_names in os.walk(directory_path): for file_name in file_names: file_path = os.path.join(dir_path, file_name) if not is_file_encrypted(file_path): encrypt_file(file_path, password) os.remove(file_path)
9. Viết hàm Giải mã tập tin và thư mục: Tương tự với mã hóa, việc giải mã cũng làm việc theo 2 cơ chế tương tự.
def decrypt_file(file_path, password): # Chuyển đổi mật khẩu thành khóa 256-bit (32 bytes) key = hash_password(password) # Các bước giải mã giữ nguyên không thay đổi with open(file_path, 'rb') as file: file_data = file.read() salt = file_data[:AES.block_size] cipher = AES.new(key, AES.MODE_CBC, salt) decrypted_data = cipher.decrypt(file_data[AES.block_size:]).rstrip(b' ') sp = file_path.split('.') decrypted_file_path = '.'.join(sp[:-2]) with open(decrypted_file_path, 'wb') as decrypted_file: decrypted_file.write(decrypted_data) def decrypt_directory(directory_path, password): for dir_path, dir_names, file_names in os.walk(directory_path): for file_name in file_names: file_path = os.path.join(dir_path, file_name) if is_file_encrypted(file_path): if is_password_correct(file_name, password): decrypt_file(file_path, password) os.remove(file_path) else: print("Mật khẩu không chính xác!") return
10. Viết hàm cấp quyền cho Ứng dụng được phép ghi xóa các file trên drive:
def authorize_drive(): gauth = GoogleAuth() gauth.LoadCredentialsFile("/content/client_secrets.json") drive = GoogleDrive(gauth) return drive
11. Hàm kiểm tra có phải tập tin đã mã hóa hay không: Một thư mục chứa cả tập tin chưa mã hóa và tập tin đã mã hóa , việc phân biệt file đó đã mã hóa hay chưa để tránh cho việc mã hóa hai lần và giải mã tập tin chưa mã hóa
def is_file_encrypted(file_path): return file_path.endswith(".enc")
12. Hàm kiểm tra mật khẩu giải mã có đúng với tập tin đã mã hóa hay không: Việc này như đã nói, tập tin đã mã hóa sẽ chứa chuỗi mật khẩu trên tên của nó, hàm này hỗ trợ việc kiểm tra xem mật khẩu giải mã nhập vào có đúng với mật khẩu đã mã hóa tên tập tin đó hay không?
def is_password_correct(file_name, password): hashedPassword = hash_string(password) sp = file_name.split('.') if hashedPassword == sp[len(sp)-2]: return True else: return False
13. Hàm upload tập tin đã mã hóa hoặc tập tin đã giải mã lên drive thay thế cho tập tin cũ:
def upload_to_drive(file_path, drive): gfile = drive.CreateFile({'title': os.path.basename(file_path)}) gfile.SetContentFile(file_path) gfile.Upload()
14. Hàm hỗ trợ cho việc xóa thùng rác và tạo chuỗi mã hóa:
def hash_string(string): hashed_string = hashlib.sha256(string.encode()).hexdigest() return hashed_string def empty_trash(): drive_service = build('drive', 'v3') time.sleep(5) drive_service.files().emptyTrash().execute()
15. Hàm main: Về hàm này thì chủ yếu là kiến thức cơ bản, nên không cần giải thích gì nhé
def main(): password = enter_password() path = enter_path() choice = input("Chọn tùy chọn: 1. Mã hóa | 2. Giải mã: ") drive = authorize_drive() auth.authenticate_user() if os.path.isdir(path): if choice == '1': encrypt_directory(path, password) empty_trash() print("Đã mã hóa và tải lên thư mục thành công!") elif choice == '2': decrypt_directory(path, password) empty_trash() print("Đã giải mã và tải lên thư mục thành công!") else: print("Tùy chọn không hợp lệ!") elif os.path.isfile(path): if choice == '1': if not is_file_encrypted(path): encrypt_file(path, password) os.remove(path) empty_trash() print("Đã mã hóa và tải lên tập tin thành công!") else: print("Tệp đã được mã hóa trước đó.") elif choice == '2': if is_file_encrypted(path): if is_password_correct(path, password): decrypt_file(path, password) os.remove(path) empty_trash() print("Đã giải mã và tải lên tập tin thành công!") else: print("Mật khẩu không chính xác!") else: print("Tệp không phải là tệp đã mã hóa.") else: print("Tùy chọn không hợp lệ!") else: print("Đường dẫn không hợp lệ!")
16. Lệnh gọi Main: Lệnh này sẽ chính thức thực thi những gì đã tạo phía trên, có thể để chung hoặc tách ra phần riêng
if __name__ == '__main__': main()
3. Cải tiến input
Vì Colab cho phép chúng ta thực hiện việc input thông qua form nên ta sẽ thực hiện comment 3 dòng lấy dữ liệu thông qua command input và đưa nó thành form Comment input sửa hàm main như sau:
def main(): # password = enter_password() # path = enter_path() # choice = input("Chọn tùy chọn: 1. Mã hóa | 2. Giải mã: ") drive = authorize_drive() auth.authenticate_user() if os.path.isdir(path): if choice == '1': encrypt_directory(path, password) empty_trash() print("Đã mã hóa và tải lên thư mục thành công!") elif choice == '2': decrypt_directory(path, password) empty_trash() print("Đã giải mã và tải lên thư mục thành công!") else: print("Tùy chọn không hợp lệ!") elif os.path.isfile(path): if choice == '1': if not is_file_encrypted(path): encrypt_file(path, password) os.remove(path) empty_trash() print("Đã mã hóa và tải lên tập tin thành công!") else: print("Tệp đã được mã hóa trước đó.") elif choice == '2': if is_file_encrypted(path): if is_password_correct(path, password): decrypt_file(path, password) os.remove(path) empty_trash() print("Đã giải mã và tải lên tập tin thành công!") else: print("Mật khẩu không chính xác!") else: print("Tệp không phải là tệp đã mã hóa.") else: print("Tùy chọn không hợp lệ!") else: print("Đường dẫn không hợp lệ!")
Thêm code nhận form cho Ứng dụng bằng cách đặt các dòng sau trước code import của phần 6. Đối với biến "choice", 1: Mã hóa - 2: Giải mã
#@title Default title text
password = "" #@param {type:"string"}
path = "" #@param {type:"string"}
choice = "1" #@param ["1", "2"]
4. Tổng thể ứng dụng
Sau khi thực hiện hoàn chỉnh bạn sẽ có được một Ứng dụng hoàn chỉnh thế này:
#@title Default title text
password = "" #@param {type:"string"}
path = "" #@param {type:"string"}
choice = "1" #@param ["1", "2"]
import os
from Crypto.Cipher import AES
from Crypto.Random import get_random_bytes
from pydrive.auth import GoogleAuth
from pydrive.drive import GoogleDrive
import hashlib
import bcrypt
from google.colab import auth
from googleapiclient.discovery import build
import time def hash_password(password): hashed_password = hashlib.sha256(password.encode()).digest() return hashed_password def encrypt_directory(directory_path, password): for dir_path, dir_names, file_names in os.walk(directory_path): for file_name in file_names: file_path = os.path.join(dir_path, file_name) if not is_file_encrypted(file_path): encrypt_file(file_path, password) os.remove(file_path) def encrypt_file(file_path, password): # Chuyển đổi mật khẩu thành khóa 256-bit (32 bytes) key = hash_password(password) # Các bước mã hóa giữ nguyên không thay đổi salt = get_random_bytes(AES.block_size) cipher = AES.new(key, AES.MODE_CBC, salt) with open(file_path, 'rb') as file: file_data = file.read() padded_data = file_data + (AES.block_size - len(file_data) % AES.block_size) * b' ' encrypted_data = cipher.encrypt(padded_data) hashedPassword = hash_string(password) encrypted_file_path = file_path + '.' + hashedPassword +'.enc' with open(encrypted_file_path, 'wb') as encrypted_file: encrypted_file.write(salt + encrypted_data) def decrypt_directory(directory_path, password): for dir_path, dir_names, file_names in os.walk(directory_path): for file_name in file_names: file_path = os.path.join(dir_path, file_name) if is_file_encrypted(file_path): if is_password_correct(file_name, password): decrypt_file(file_path, password) os.remove(file_path) else: print("Mật khẩu không chính xác!") return def decrypt_file(file_path, password): # Chuyển đổi mật khẩu thành khóa 256-bit (32 bytes) key = hash_password(password) # Các bước giải mã giữ nguyên không thay đổi with open(file_path, 'rb') as file: file_data = file.read() salt = file_data[:AES.block_size] cipher = AES.new(key, AES.MODE_CBC, salt) decrypted_data = cipher.decrypt(file_data[AES.block_size:]).rstrip(b' ') sp = file_path.split('.') decrypted_file_path = '.'.join(sp[:-2]) with open(decrypted_file_path, 'wb') as decrypted_file: decrypted_file.write(decrypted_data) def authorize_drive(): gauth = GoogleAuth() gauth.LoadCredentialsFile("/content/client_secrets.json") drive = GoogleDrive(gauth) return drive def is_file_encrypted(file_path): return file_path.endswith(".enc") def upload_to_drive(file_path, drive): gfile = drive.CreateFile({'title': os.path.basename(file_path)}) gfile.SetContentFile(file_path) gfile.Upload() def is_password_correct(file_name, password): hashedPassword = hash_string(password) sp = file_name.split('.') if hashedPassword == sp[len(sp)-2]: return True else: return False def hash_string(string): hashed_string = hashlib.sha256(string.encode()).hexdigest() return hashed_string def empty_trash(): drive_service = build('drive', 'v3') time.sleep(5) drive_service.files().emptyTrash().execute() def main(): # password = enter_password() # path = enter_path() # choice = input("Chọn tùy chọn: 1. Mã hóa | 2. Giải mã: ") drive = authorize_drive() auth.authenticate_user() if os.path.isdir(path): if choice == '1': encrypt_directory(path, password) empty_trash() print("Đã mã hóa và tải lên thư mục thành công!") elif choice == '2': decrypt_directory(path, password) empty_trash() print("Đã giải mã và tải lên thư mục thành công!") else: print("Tùy chọn không hợp lệ!") elif os.path.isfile(path): if choice == '1': if not is_file_encrypted(path): encrypt_file(path, password) os.remove(path) empty_trash() print("Đã mã hóa và tải lên tập tin thành công!") else: print("Tệp đã được mã hóa trước đó.") elif choice == '2': if is_file_encrypted(path): if is_password_correct(path, password): decrypt_file(path, password) os.remove(path) empty_trash() print("Đã giải mã và tải lên tập tin thành công!") else: print("Mật khẩu không chính xác!") else: print("Tệp không phải là tệp đã mã hóa.") else: print("Tùy chọn không hợp lệ!") else: print("Đường dẫn không hợp lệ!") if __name__ == '__main__': main()
5. Hướng dẫn cơ bản
1. Lấy đường dẫn Folder và File từ Colab
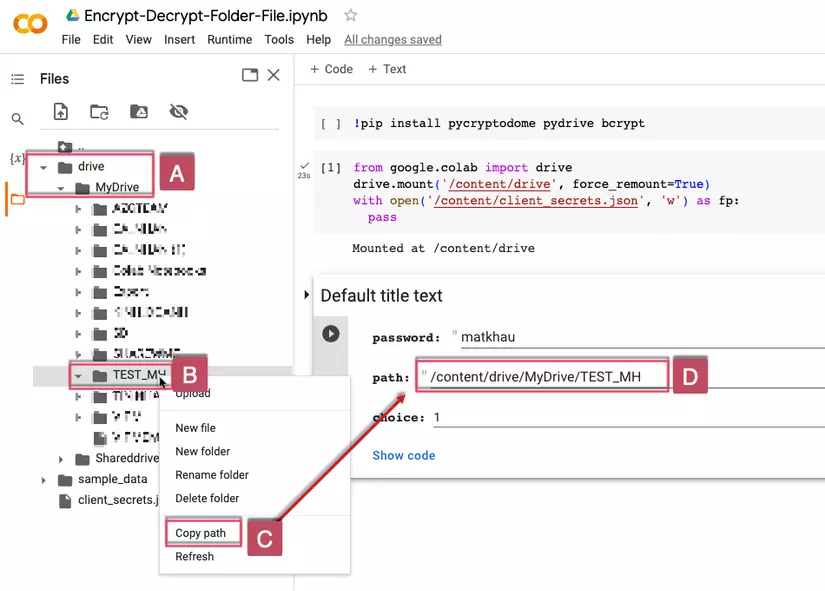
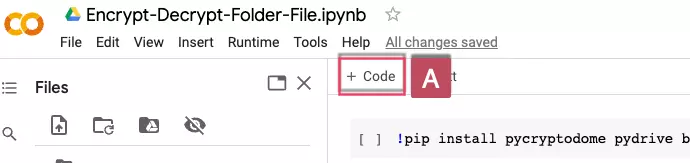
2. Thêm block code Colab
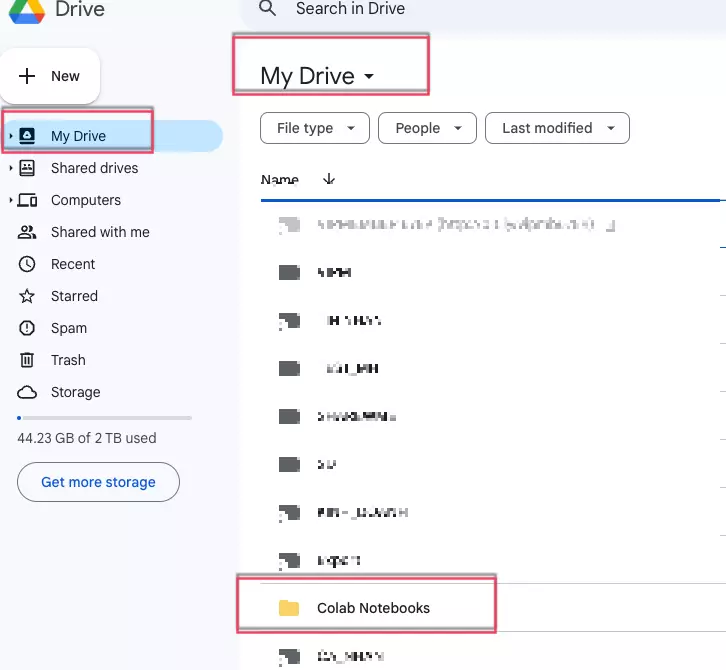
3. Điểm lưu file Colab
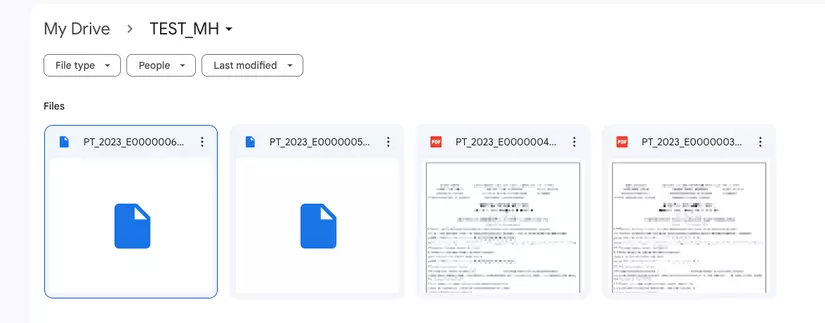
4. Thành phẩm: 04 tập tin PDF được mã hóa 2 cái và 2 cái giữ nguyên
6. Lưu ý khi sử dụng mã hóa trên Google Drive
-
Khi sử dụng mã hóa trên Google Drive, có một số lưu ý cần lưu ý. Đầu tiên, bạn cần phải đảm bảo rằng bạn có một bản sao dự phòng của tất cả các tệp tin và mật khẩu mã hóa của bạn. Nếu bạn quên mật khẩu, bạn không thể truy cập dữ liệu của mình nữa. Thứ hai, hãy cẩn thận khi cập nhật hoặc xóa các tệp tin trong phân vùng ảo của bạn, vì mọi thay đổi sẽ ảnh hưởng đến drive của bạn.
-
Đối với Colab, khi chạy chế độ ngoài GPU các bạn sẽ có tầm 107GB ổ cứng, nên việc này sẽ giới hạn việc mã hóa tập tin lớn, nên chú ý điều này trước khi thực hiện cho những tập tin quá lớn
7. Kết luận
Mã hóa dữ liệu là một cách hiệu quả để bảo vệ dữ liệu quan trọng của bạn trên Google Drive. Bằng cách sử dụng Google Colab, bạn có thể tạo ra một phân vùng ảo và mã hóa dữ liệu trên đó. Tuy nhiên, hãy cẩn thận khi sử dụng mã hóa và đảm bảo rằng bạn có một bản sao dự phòng của tất cả các tệp tin và mật khẩu mã hóa của bạn.