Chào mừng các bạn quay trở lại với series học Laravel với VueJS của mình, ở bài này mình sẽ hướng dẫn các bạn các phân quyền bằng Laravel và VueJS mà không cần cài đặt thêm bất kì package hay library nào khác.
Thiết lập
Nếu các bạn vẫn theo dõi series này của mình từ đầu đến giờ thì ta có thể dùng luôn project cũ còn nếu bạn là người mới thì nhớ tạo mới project Laravel bằng composer (hoặc laravel new <projectname>), sau đó nhớ chạy command npm install nhé  .
.
Tiếp theo ta vào resources/assets/js/components/ tạo mới file User.vue với nội dung như sau:
<template> <div class="user-management"> User </div>
</template> <script> export default { }
</script> <style lang="scss" scoped>
</style>
Sau đó ta khai báo component này trong file resources/assets/js/app.js như sau:
Vue.component('User', require('./components/User.vue'));
Cuối cùng là thêm nó vào file resources/views/welcome.blade.php.
<!doctype html>
<html lang="{{ app()->getLocale() }}"> <head> <title>Laravel</title> <meta name="csrf-token" content="{{ csrf_token() }}"> <link rel="stylesheet" type="text/css" href="/css/app.css"> <link href="//maxcdn.bootstrapcdn.com/font-awesome/4.7.0/css/font-awesome.min.css" rel="stylesheet"> </head> <body> <div id="app"> <User></User> </div> <script src="/js/app.js"></script> </body>
</html>
Sau đó các bạn nhớ luôn chạy 2 command sau để khởi động app nhé:
php artisan serve
npm run watch
Mở trình duyệt lên nếu thấy có dòng chữ User là ta đã thiết lập thành công bước ban đầu rồi nhé  .
.
Phân quyền trong Laravel
Đầu tiên ta chạy command sau để tạo Auth resource nhé:
php artisan make:auth
Sau đó ta tạo mới model Role như sau:
php artisan make:model Role -m
Chú ý bên trên option -m để tạo luôn migrations cho model Role.
Sau đó ta vào database mở migration ...create_roles và sửa lại hàm up() như sau:
public function up()
{ Schema::create('roles', function (Blueprint $table) { $table->increments('id'); $table->string('name'); $table->string('description'); $table->timestamps(); });
}
Ở đây mỗi quyền chúng ta sẽ có: id, name (tên quyền), description (mô tả) và timestamps.
Phân tích một chút nhé. Thông thường mỗi user sẽ có thể có nhiều quyền: ví dụ vừa là nhân viên bán hàng, vừa là nhân viên bốc vác...và mỗi một quyền thì sẽ có thể được sở hữu bởi nhiều user. Do đó mục đích của ta là User và Role sẽ là quan hệ many-to-many (nhiều-nhiều). Vì thế ta cần tạo thêm một bảng role-user giông như một bảng nối giữa Role và User chứa id của User và id của Role tương ứng với user đó.
Ta tạo mới một migration như sau:
php artisan make:migration create_role_user_table
Sau đó sửa lại hàm up trong migration này như sau:
public function up()
{ Schema::create('role_user', function (Blueprint $table) { $table->increments('id'); $table->integer('role_id')->unsigned(); $table->integer('user_id')->unsigned(); $table->timestamps(); });
}
Tiếp theo ta sẽ thiết lập mối quan hệ giữa Role và User ở trong các model nhé:
Ở User.php ta thêm mới một hàm như sau:
public function roles()
{ return $this->belongsToMany(Role::class);
}
Còn bên Role.php ta cũng thêm tương tự như sau:
public function users()
{ return $this->belongsToMany(User::class);
}
Nhớ khai báo Use trong mỗi model không sẽ bị lỗi class not found nhé các bạn 
Tạo dữ liệu sẵn
Sau đây có code logic phần phân quyền rồi, ta sẽ tạo seeder mục đích đơn giản là tạo dữ liệu sẵn vì hiện giờ ta chưa có phần tạo bằng view nhé(lát nữa ta làm sau  ):
Ta tạo 2 seeder cho
 User và Role như sau:
php artisan make:seeder RoleTableSeeder php artisan make:seeder UserTableSeeder
Sau đó ta vào RoleTableSeeder sửa lại như sau:
<?php use Illuminate\Database\Seeder;
use App\Role; class RoleTableSeeder extends Seeder
{ /** * Run the database seeds. * * @return void */ public function run() { $role_employee = new Role(); $role_employee->name = 'employee'; $role_employee->description = 'A Employee User'; $role_employee->save(); $role_employee = new Role(); $role_employee->name = 'saler'; $role_employee->description = 'A Saler User'; $role_employee->save(); $role_manager = new Role(); $role_manager->name = 'admin'; $role_manager->description = 'A Admin User'; $role_manager->save(); }
}
Tiếp tục sửa ở UserTableSeeder như sau:
<?php use Illuminate\Database\Seeder;
use App\User;
use App\Role; class UserTableSeeder extends Seeder
{ /** * Run the database seeds. * * @return void */ public function run() { $role_employee = Role::where('name', 'employee')->first(); $role_manager = Role::where('name', 'admin')->first(); $role_saler = Role::where('name', 'saler')->first(); $employee = new User(); $employee->name = 'Employee Name'; $employee->email = '_@.com'; $employee->password = bcrypt('123456'); $employee->save(); $employee->roles()->attach($role_employee); $saler = new User(); $saler->name = 'Saler Name'; $saler->email = '_@.com'; $saler->password = bcrypt('123456'); $saler->save(); $saler->roles()->attach($role_saler); $manager = new User(); $manager->name = 'Admin Name'; $manager->email = '_@.com'; $manager->password = bcrypt('123456'); $manager->save(); $manager->roles()->attach($role_manager); }
}
Giải thích: Laravel hỗ trợ chúng ta đến tận chân răng  . Để thêm một quyền cho 1 user ta sử dụng hàm
 attach. Còn nếu muốn xóa đi 1 quyền nào đó thì các bạn sử dụng hàm detach($role_id) nhé, phần này quan trọng nên các bạn chú ý 2 hàm này để tự áp dụng tùy hoàn cảnh nhé
Sau đó ta vào DatabaseSeeder sửa lại như sau:
<?php use Illuminate\Database\Seeder; class DatabaseSeeder extends Seeder
{ /** * Seed the application's database. * * @return void */ public function run() { // $this->call(UsersTableSeeder::class); // Role comes before User seeder here. $this->call(RoleTableSeeder::class); // User seeder will use the roles above created. $this->call(UserTableSeeder::class); }
}
Còn một chút nữa thôi ^^
Ta mở model User.php thêm vào 3 phương thức sau để có thể dùng để kiểm tra quyền của user sau này:
/**
* @param string|array $roles
*/
public function authorizeRoles($roles)
{ if (is_array($roles)) { return $this->hasAnyRole($roles) || abort(401, 'This action is unauthorized.'); } return $this->hasRole($roles) || abort(401, 'This action is unauthorized.');
}
/**
* Check multiple roles
* @param array $roles
*/
public function hasAnyRole($roles)
{ return null !== $this->roles()->whereIn(‘name’, $roles)->first();
}
/**
* Check one role
* @param string $role
*/
public function hasRole($role)
{ return null !== $this->roles()->where(‘name’, $role)->first();
}
Giải thích:
hasRole: phương thức này để check nếu như người dùng có 1 quyền nào đó, tham số nhận vàostringhasAnyRole: check nếu người dùng có một trong các quyền, tham số nhận vàoarrayauthorizeRoles: check nếu người dùng không thoả mãn quyền thì bắn raexception, dùng cách này sau này ta sẽ render ra trang thông báo lỗi cho người dùng, tham số nhận vàoarrayhoặcstring
Sau đó các bạn mở app/Http/Controllers/Auth/RegisterRegisterController.php, sửa lại một chút như sau để khi người dùng đăng kí ta set giá trị mặc định của quyền cho user:
use App\Role; ... protected function create(array $data)
{ $user = User::create([ 'name' => $data['name'], 'email' => $data['email'], 'password' => bcrypt($data['password']), ]); $user ->roles() ->attach(Role::where('name', 'employee')->first()); return $user;
}
Testing
Phù... còn bước cuối cùng để test nữa thôi. Ta mở routes/web.php để yêu cầu đăng nhập khi truy cập:
Route::get('/', function () { return view('welcome');
})->middleware('auth'); Route::get('/home', '_@.com')->name('home');
Tiếp theo ta mở HomeController để check quyền nếu user muốn truy cập vào route /home:
<?php namespace App\Http\Controllers; use Illuminate\Http\Request; class HomeController extends Controller
{ /** * Create a new controller instance. * * @return void */ public function __construct() { $this->middleware('auth'); } /** * Show the application dashboard. * * @return \Illuminate\Http\Response */ public function index(Request $request) { $request->user()->authorizeRoles(['employee', 'admin']); return view('home'); }
}
Ổn rồi đó, bây giờ ta bắt đầu tạo DB và seed dữ liệu nhé. Chú ý nhớ trước đó tự tạo db sẵn và sửa lại file .env nha các bạn(bước này đơn giản các bạn tự làm nhé, nếu có gì thắc mắc comment cho mình nhé):
php artisan migrate:fresh --seed
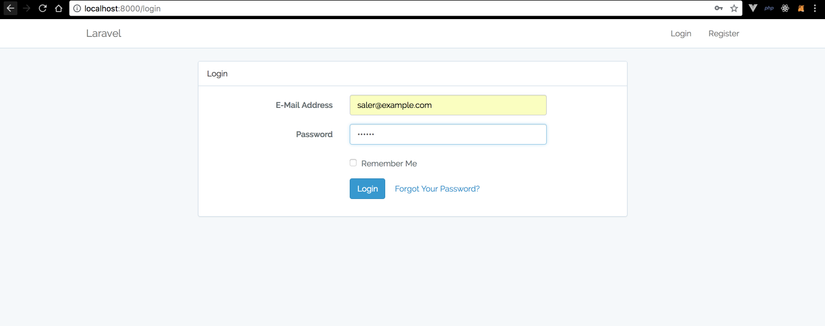
Bây giờ thử truy cập vào http://localhost:8000/, ta sẽ nhận được yêu cầu đăng nhập, ta thử đăng nhập bằng tài khoản saler nhé:

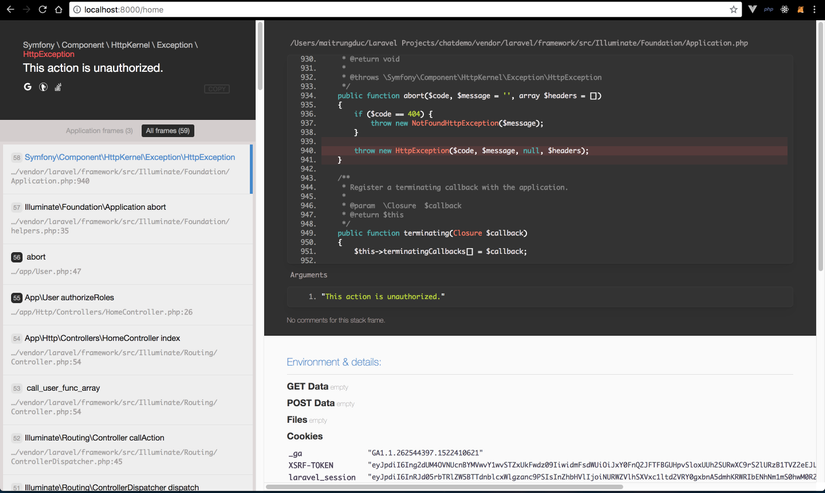
Sau đó ta sẽ được redirect đến trang User, giờ các bạn thử truy cập route /home sẽ bị lỗi như sau:
 Trông có vẻ ok đấy nhỉ, nhưng thế này nhìn không được thân thiện người dùng lắm. Giờ ta sẽ tạo một trang để hiện thị thông tin khi có lỗi xảy ra cho đẹp hơn nhé. Laravel hỗ trợ chúng ta cách làm rất đơn giản.
Các bạn mở resources/view tạo folder errors, sau đó tạo 1 file blade tên giống mã lỗi mà ta trả về (ở đây là 401), nên ta sẽ tạo file 401.blade.php nhé:
<!DOCTYPE html>
<html>
<head> <meta charset="utf-8"> <meta http-equiv="X-UA-Compatible" content="IE=edge"> <meta name="viewport" content="width=device-width, initial-scale=1"> <title>Laravel</title> <!-- Fonts --> <link href="https://fonts.googleapis.com/css?family=Raleway:100,600" rel="stylesheet" type="text/css"> <style> html, body { background-color: #fff; color: #636b6f; font-family: 'Raleway', sans-serif; font-weight: 100; height: 100vh; margin: 0; } .full-height { height: 100vh; } .flex-center { align-items: center; display: flex; justify-content: center; } .content { text-align: center; } .title { font-size: 84px; text-align: center; } .m-b-md { margin-bottom: 30px; } </style>
</head>
<body> <div class="title m-b-md flex-center full-height"> Action unauthorized! </div>
</body>
</html>
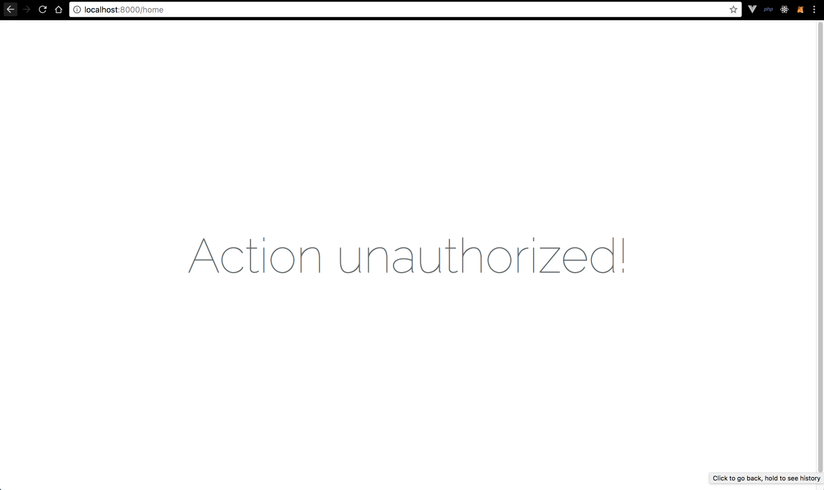
Âu câyyyy  . Thử load lại trang cũ và ta sẽ thấy như sau:
 Từ đó các bạn có thể tuỳ chỉnh in ra thông tin gì tuỳ ý
Các bạn đọc đến đây là đã hiểu được cách phân quyền như thế nào rồi đó  . Nếu muốn biết thêm cách tạo view CRUD phân quyền cho user sử dụng VueJS thì xem tiếp phần dưới nhé
View CRUD User và phân quyền bằng VueJS
Đầu tiên ta tạo UserController với option resource như sau:
php artisan make:controller UserController --resource
Sau đó ta mở routes/web.php và sửa lại:
Route::get('/', function () { return view('welcome');
})->middleware('auth'); Route::get('/home', '_@.com')->name('home'); Route::resource('users', 'UserController'); Route::get('/getCurrentUser', function() { return Auth::user()->load('roles');
}); Route::match(['get', 'post'], '/logout', 'Auth\_@.com')->name('logout');
Giải thích: ở đây mình có thêm vào một số route như sau:
Route::resource('users'...): dùng để CRUD user/getCurrentUser: để lấy thông tin về user hiện tại đang login, mình lấy kèm theo danh sách quyền của user đó/logout: ở đây khi chỉ cần bắt được request với method làgethoặcpostthì mình sẽ đều cho user logout ra khỏi app Tiếp theo ta quay lại componentUser.vuemà ta tạo từ đầu bài và sửa lại như sau:
<template> <div class="user-management"> <nav class="navbar navbar-default navbar-static-top"> <div class="container"> <div class="navbar-header"> <!-- Collapsed Hamburger --> <button type="button" class="navbar-toggle collapsed" data-toggle="collapse" data-target="#app-navbar-collapse" aria-expanded="false"> <span class="sr-only">Toggle Navigation</span> <span class="icon-bar"></span> <span class="icon-bar"></span> <span class="icon-bar"></span> </button> <!-- Branding Image --> <a class="navbar-brand" href="/"> Laravel </a> </div> <div class="collapse navbar-collapse" id="app-navbar-collapse"> <!-- Left Side Of Navbar --> <ul class="nav navbar-nav"> </ul> <!-- Right Side Of Navbar --> <ul class="nav navbar-nav navbar-right"> <li class="dropdown"> <a href="#" class="dropdown-toggle" data-toggle="dropdown" role="button" aria-expanded="false" aria-haspopup="true"> {{ currentUser.name }} <span class="caret"></span> </a> <ul class="dropdown-menu"> <li> <a href="/logout">Logout</a> </li> </ul> </li> </ul> </div> </div> </nav> </div>
</template> <script> export default { data() { return { currentUser: {} } }, created() { this.getCurrentUser() }, methods: { getCurrentUser() { axios.get('/getCurrentUser') .then(response => { this.currentUser = response.data }) .catch(error => { console.log(error) }) } } }
</script> <style lang="scss" scoped>
</style>
Ở component trên mình đơn giản là code phần giao diện, tạo một method lấy thông tin user hiện tại đang login, sau đó hiển thị ra.
Thử load lại trang xem sao nhé các bạn  :
:

Lấy danh sách user
Ta làm như sau:
<template> <div class="user-management"> <!-- ...Navbar --> <div class="list_user table-responsive container"> <table class="table table-hover"> <thead> <tr> <td>ID</td> <td>Name</td> <td>Email</td> <td>Role</td> <td>Action</td> </tr> </thead> <tbody v-if="list_users.length"> <tr v-for="user in list_users"> <td>{{ user.id }}</td> <td>{{ user.name }}</td> <td>{{ user.email }}</td> <td> <span v-for="role in user.roles"> {{ role.name }}, </span> </td> <td> <button class="btn btn-success"> Edit </button> <button class="btn btn-danger">Delete</button> </td> </tr> </tbody> </table> </div> </div>
</template> <script> export default { data() { return { currentUser: {}, list_users: [] } }, created() { this.getCurrentUser() this.getListUsers() }, methods: { getCurrentUser() { axios.get('/getCurrentUser') .then(response => { this.currentUser = response.data }) .catch(error => { console.log(error) }) }, getListUsers() { axios.get('/users') .then(response => { this.list_users = response.data this.list_users.forEach(user => { Vue.set(user, 'isEdit', false) }) }) .catch(error => { console.log(error) }) }, } }
</script> <style lang="scss" scoped>
</style>
Giải thích:
- Phần code Navbar mình comment lại và không thêm vào đây vì đã có ở phần trước

- Ta có một method
getListUserslấy về danh sách user và gán vàolist_users - Sau khi lấy được danh sách user mình thêm cho mỗi user 1 trường là
isEdit(để sau này click edit sẽ xổ ra form sửa ngay tại table) bằng cách sử dụngVue.set, mục đích là muốnisEditlà reactive data(khi thay đổi thì DOM sẽ re-render), nếu các bạn chỉ viết làuser.isEdit = falsethì DOM sẽ không render lại khiisEditthay đổi(cần phải gọi hàm$forceUpdate). Chi tiết các bạn xem ở bài post này của mình nhé - Phần code
templatebên trên mình tạo mộttableđể hiển thị thông tin user Bây giờ ta quay lạiapp/Http/Controllers/UserControllervà sửa hàmindexnhư sau:
use App\User;
use App\Role;
... /** * Display a listing of the resource. * * @return \Illuminate\Http\Response */ public function index() { $users = User::get()->load('roles'); return $users; } ...
Ổn rồi đó, giờ thử load lại trang các bạn sẽ thấy ta đã lấy được danh sách user. Nhưng ta sẽ chỉ muốn là chỉ admin mới được sửa hoặc xoá user. Khi đó ta kiểm tra user có phải admin bằng cách như sau:
checkIsAdmin() { if(this.currentUser.roles) { let check = false this.currentUser.roles.forEach(role => { if(role.name === 'admin') { check = true } }) return check }
}
Ở phần `table ta sửa như sau:
<td v-if="checkIsAdmin">Action</td> ... <td v-if="checkIsAdmin"> <button class="btn btn-success"> Edit </button> <button class="btn btn-danger">Delete</button>
</td>
Tạo mới user
Ta thêm phần tạo user như sau, phần này cũng chỉ admin làm được nên ta sẽ có đoạn v-if kiểm tra user có quyền admin không nhé:
<template> <div class="user-management"> <!-- Navbar --> <div class="create-user container" v-if="checkIsAdmin"> <div class="row"> <div class="col-md-3"> <input type="text" v-model="userCreate.name" class="form-control" placeholder="Name..."> </div> <div class="col-md-3"> <input type="email" v-model="userCreate.email" class="form-control" placeholder="User email..."> </div> <div class="col-md-3"> <select class="form-control" v-model="userCreate.role"> <option value="employee">Employee</option> <option value="saler">Saler</option> <option value="admin">Admin</option> </select> </div> <div class="col-md-3"> <button class="btn btn-primary" @click="createUser">Create</button> </div> </div> </div> <!-- Table User --> </div>
</template>
Sau đó ở trong data ta sửa lại như sau:
data() { return { userCreate: { name: '', email: '', role: 'employee' }, currentUser: {}, list_users: [] }
},
Tiếp theo ta thêm hàm để gửi thông tin user sang backend:
createUser() { axios.post('/users', {user: this.userCreate}) .then(response => { console.log(response) this.userCreate = {} this.getListUsers() }) .catch(error => { console.log(error) })
}
Cuối cùng ta quay trở lại UserController.php sửa hàm store như sau (mặc định khi tạo mới user sẽ có mật khẩu là 123456):
public function store(Request $request)
{ $data = $request->input('user'); $user = new User(); $user->name = $data['name']; $user->email = $data['email']; $user->password = bcrypt('123456'); $role = Role::where('name', $data['role'])->first(); $user->save(); $user->roles()->attach($role); return response('success');
}
Sau đó các bạn thử load lại trang và tự test để xem kết quả nhé.
Kết luận
Phù... Thực sự mình muốn làm cả phần edit và delete user nhưng viết bài dài trên Viblo là bị giật tưng bừng dù cho cấu hình máy mình cũng không đến nỗi tệ, công nghệ đầy đủ  , các bạn có thể tự thực hành và để lại comment bên dưới nếu có thắc mắc nhé.
Qua bài này các bạn đã có thể thấy được cách phân quyền trong Laravel như thế nào, từ đó áp dụng cho các mục tiêu tuỳ ý nhé.
Ở một bài khác mình sẽ hướng dẫn các bạn cách sử dụng Laravel Passport dùng để authenticate ở mức chi tiết và mạnh mẽ hơn nhé.
Toàn bộ code các bạn có thể xem ở đây (bao gồm code từ đầu series đến giờ) nhé.
Cám ơn các bạn đã theo dõi, có gì thắc mắc để lại dưới comment cho mình nhé ^^!